

This guide walks you through the essential configuration steps after completing the onboarding wizard.
Available Services
Spark CRM offers several optional services that enhance your business operations. Each service has a per-use fee based on your plan.
Address Verification
What it does: Verifies customer shipping addresses before processing orders.
Benefits:
- Reduces failed deliveries
- Prevents shipping to invalid addresses
- Decreases chargebacks from delivery issues
How to enable:
- Open the user/profile menu at the bottom of the sidebar and click Billing
- Click Manage Services, then find Address Verification under “Validation Services”
- Toggle it on, then click Save Settings
Email Validation
What it does: Verifies customer email addresses are real and deliverable.
Benefits:
- Reduces bounce rates
- Prevents fraud from fake emails
- Improves customer communication
How to enable:
- Open the user/profile menu at the bottom of the sidebar and click Billing
- Click Manage Services, then find Email Validation under “Validation Services”
- Toggle it on, then click Save Settings
Phone Validation
What it does: Verifies customer phone numbers and detects line type (mobile/landline/VOIP/tollfree) and carrier. Formatted and national-format values are stored in the validation metadata; the customer’s saved phone number is not rewritten.
Benefits:
- Ensures phone numbers are valid
- Identifies line type (mobile, landline, VOIP, tollfree) and carrier
- Improves customer contact rates
How to enable:
- Open the user/profile menu at the bottom of the sidebar and click Billing
- Click Manage Services, then find Phone Validation under “Validation Services”
- Toggle it on, then click Save Settings
Enhanced Shipment Tracking
What it does: Provides advanced shipment tracking across multiple carriers.
Benefits:
- Real-time tracking updates
- Multi-carrier support
- Automated customer notifications
How to enable:
- Open the user/profile menu at the bottom of the sidebar and click Billing
- Click Manage Services and find Enhanced Shipment Tracking under “Fulfillment Services”
- Toggle it on, then click Save Settings
Email AI
What it does: AI-powered customer service for email support.
Benefits:
- Automatic email classification by intent
- AI-generated response suggestions
- Spam and threat detection
- Ticket management automation
How to enable:
- Open the user/profile menu at the bottom of the sidebar and click Billing
- Click Manage Services and find Email AI Agent under “AI Services”
- Toggle it on, then click Save Settings
Note: Email AI is charged per resolved ticket.
Note: Enabling Email AI Agent also enables Enhanced Shipment Tracking automatically — both services will be billed.
Dispute.com Integration
What it does: Connects to Dispute.com for chargeback management.
Benefits:
- Centralized dispute tracking
- Automated alert refunds and RDR handling, with representment outcomes (won/lost) recorded back from Dispute.com
- Chargeback analytics
How to enable:
- Go to Settings > Disputes (under the “Providers” group), or configure it during onboarding
- Enter your Dispute.com API key
- Click Connect (the button reads Replace API Key if a key is already stored)
Default Settings
When your account is created, all services start disabled by default. This ensures you only pay for services you actually need.
| Service | Default State | Billing |
|---|---|---|
| Address Verification | Disabled | Per verification |
| Email Validation | Disabled | Per verification |
| Phone Validation | Disabled | Per verification |
| Enhanced Shipment Tracking | Disabled | Per shipment |
| Email AI | Disabled | Per ticket |
| Anti-Fraud Lookup | Disabled | Per lookup (enabled by staff request; not in the Manage Services flyout) |
Note: 3D Secure is an internal, staff-enabled setting with no self-serve toggle and no per-transaction usage metering — 3DS challenges are currently handled by the individual payment gateways.
Billing Settings
Understanding Your Plan
Your account is subscribed to a plan that determines:
- Monthly fee - Base subscription cost
- Service fees - Per-use costs for each service
- Transaction fees - Fees per payment transaction
Viewing Your Billing
- Open the user/profile menu at the bottom of the sidebar and click Billing
- View your current plan
- See usage and upcoming charges
- Download invoices
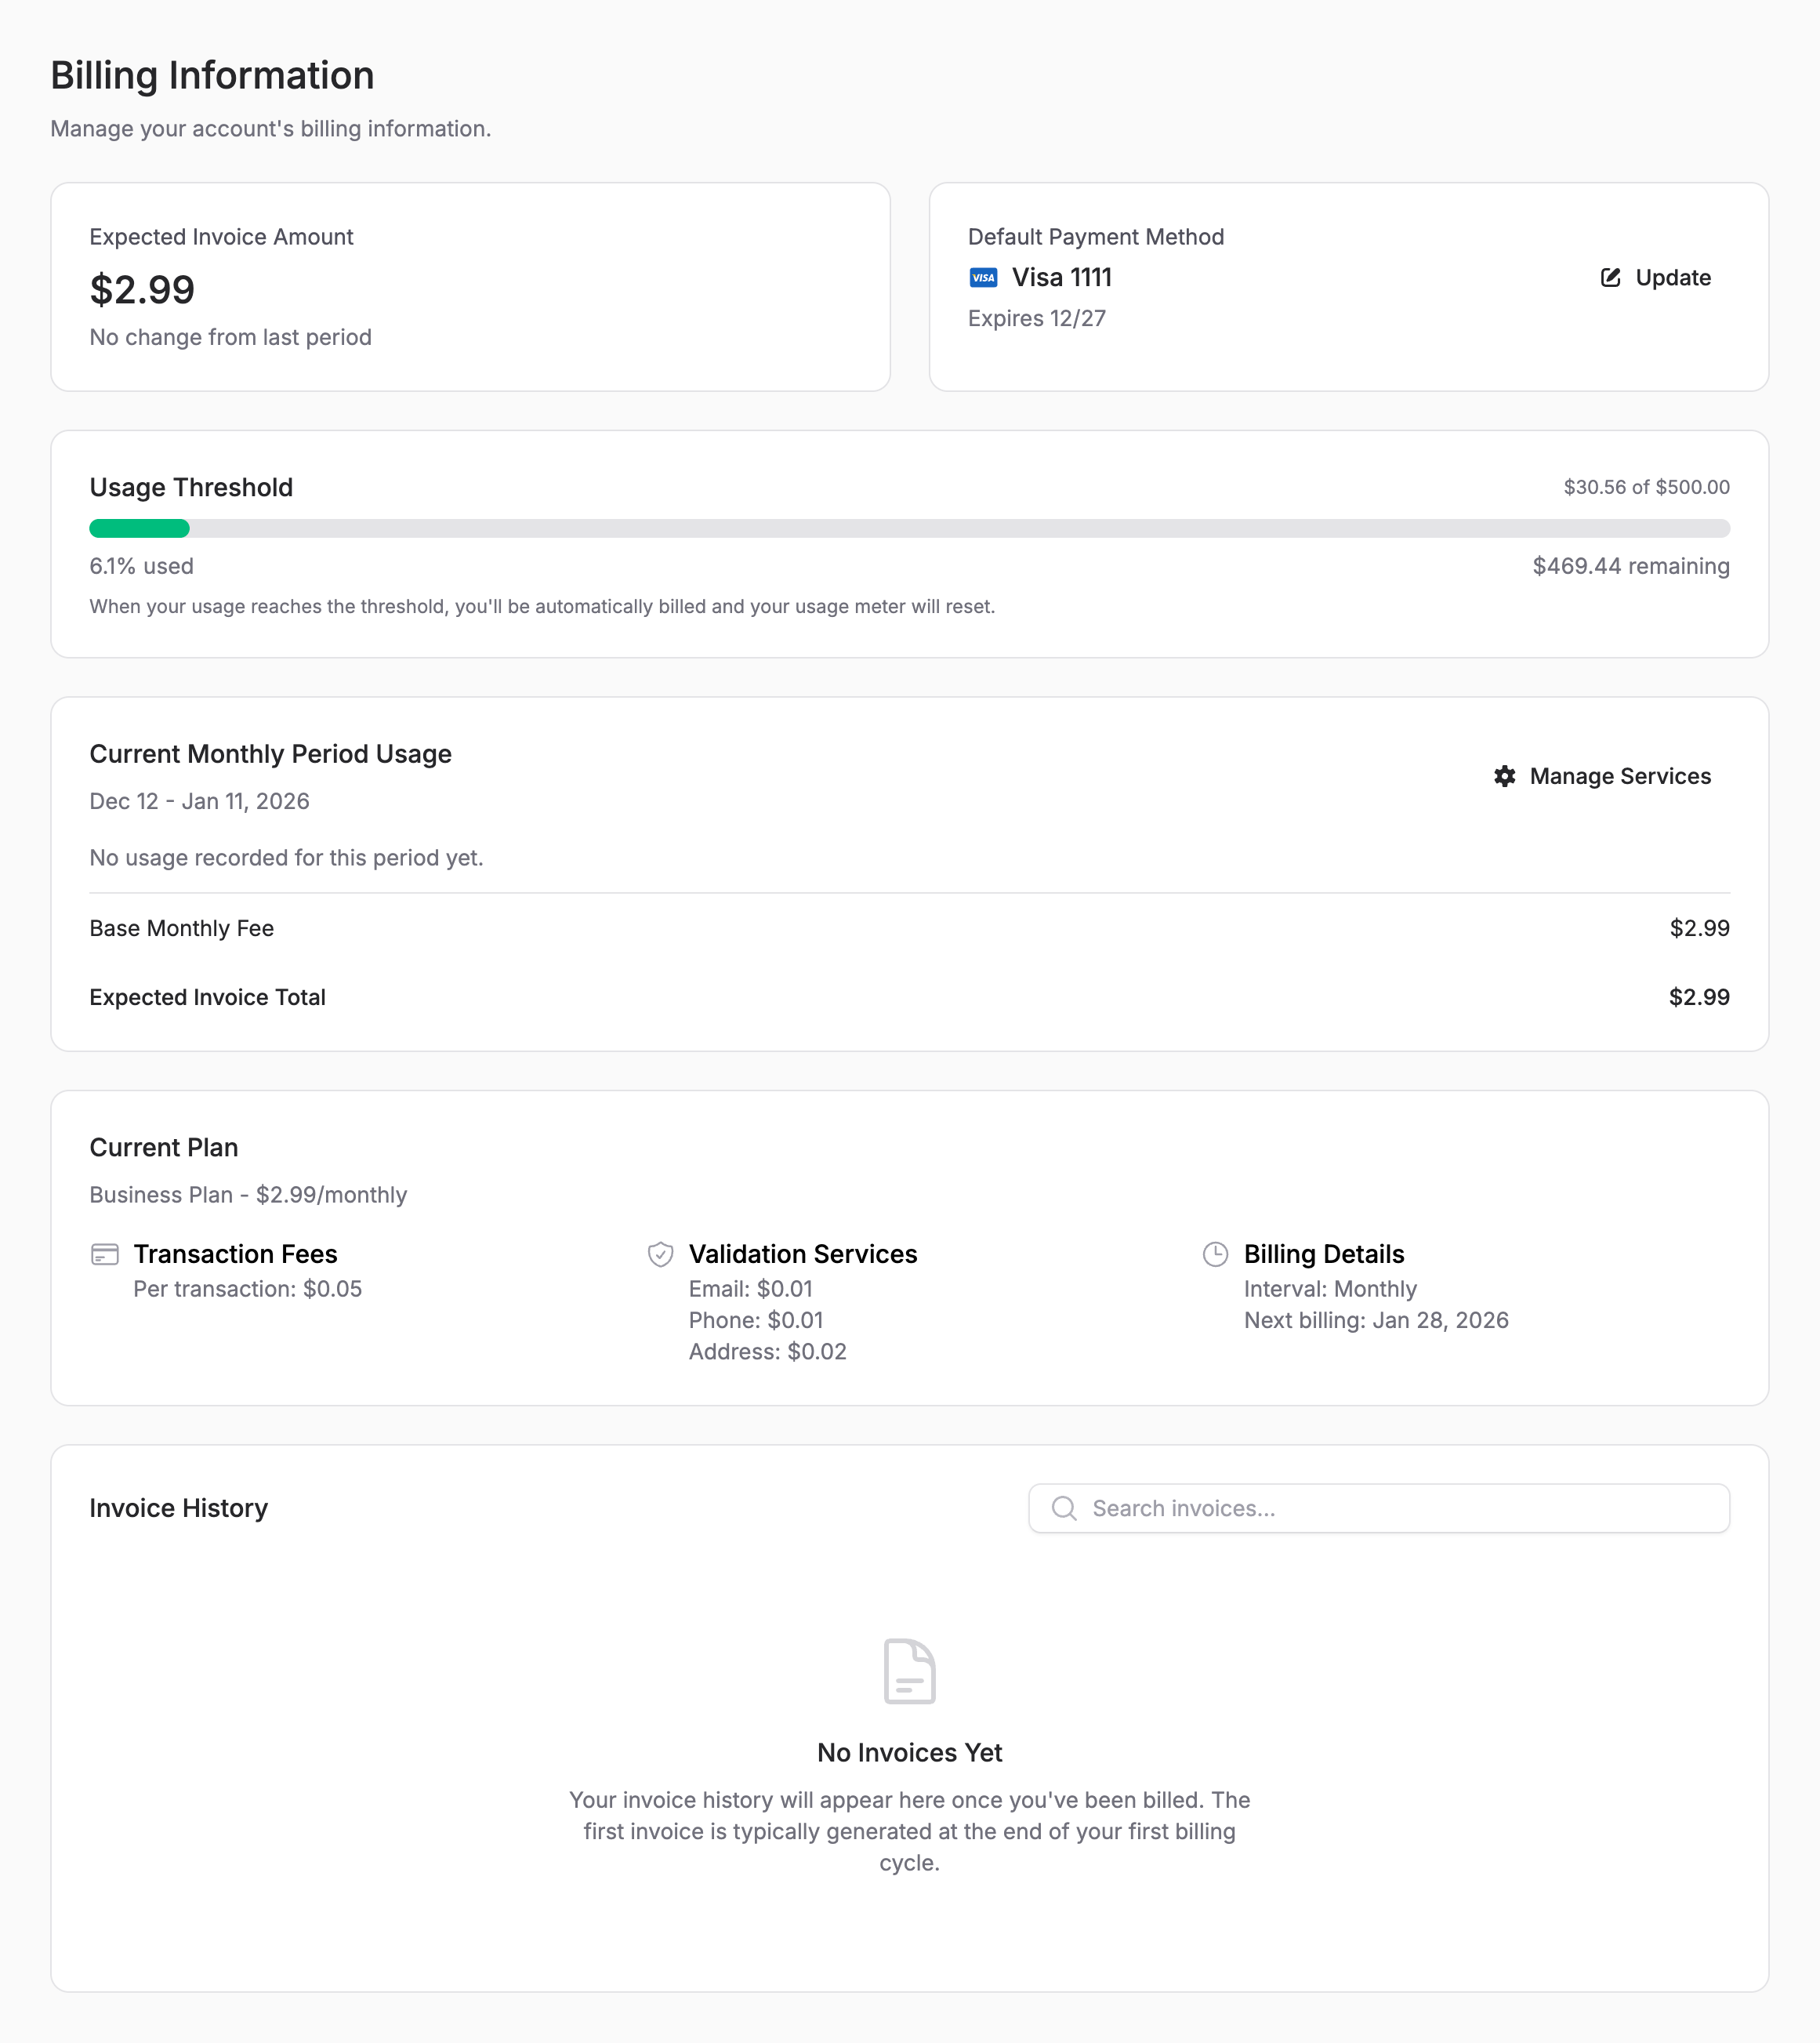 Screenshot: Your billing dashboard showing plan details, usage threshold, service consumption, and payment methods
Updating Payment Method
- Open the user/profile menu at the bottom of the sidebar and click Billing
- In the Payment Method card, click Add Payment Method (or Update if a card is already saved)
- Enter the new card details — the new card replaces whatever card is currently on file (only one payment method is kept; the previous one is deleted from Stripe)
The saved card becomes the default automatically, so there is no default-selection step.
Team Settings
Team Information
Configure your team details:
- Open the user/profile menu and click your name (Profile) — the Team Timezone card is near the bottom of that page, visible to team owners only
- Set the Team Timezone. Reports use this timezone for their date boundaries
- Other team-level configuration (SMTP, notifications, webhooks, QA rules) lives on the Settings page
Note: The Team Name field lives on the Jetstream team page at /teams/{id}, which the current sidebar and user menu do not link to.
Managing Team Members
Add and manage your team members:
- Open the user/profile menu at the bottom of the sidebar and click Team Members (/team/manage)
- Click Add User — the modal that opens is titled “Invite Team Member”
- Assign a role: Account Admin, Account Manager, Customer Support Level 1, Customer Support Level 2, or Affiliate. There is no assignable “Owner” role — team ownership is set when the account is created
- Permissions are determined entirely by the assigned role and cannot be customised per member. The one member-level option is restricting an Affiliate user to specific affiliate IDs
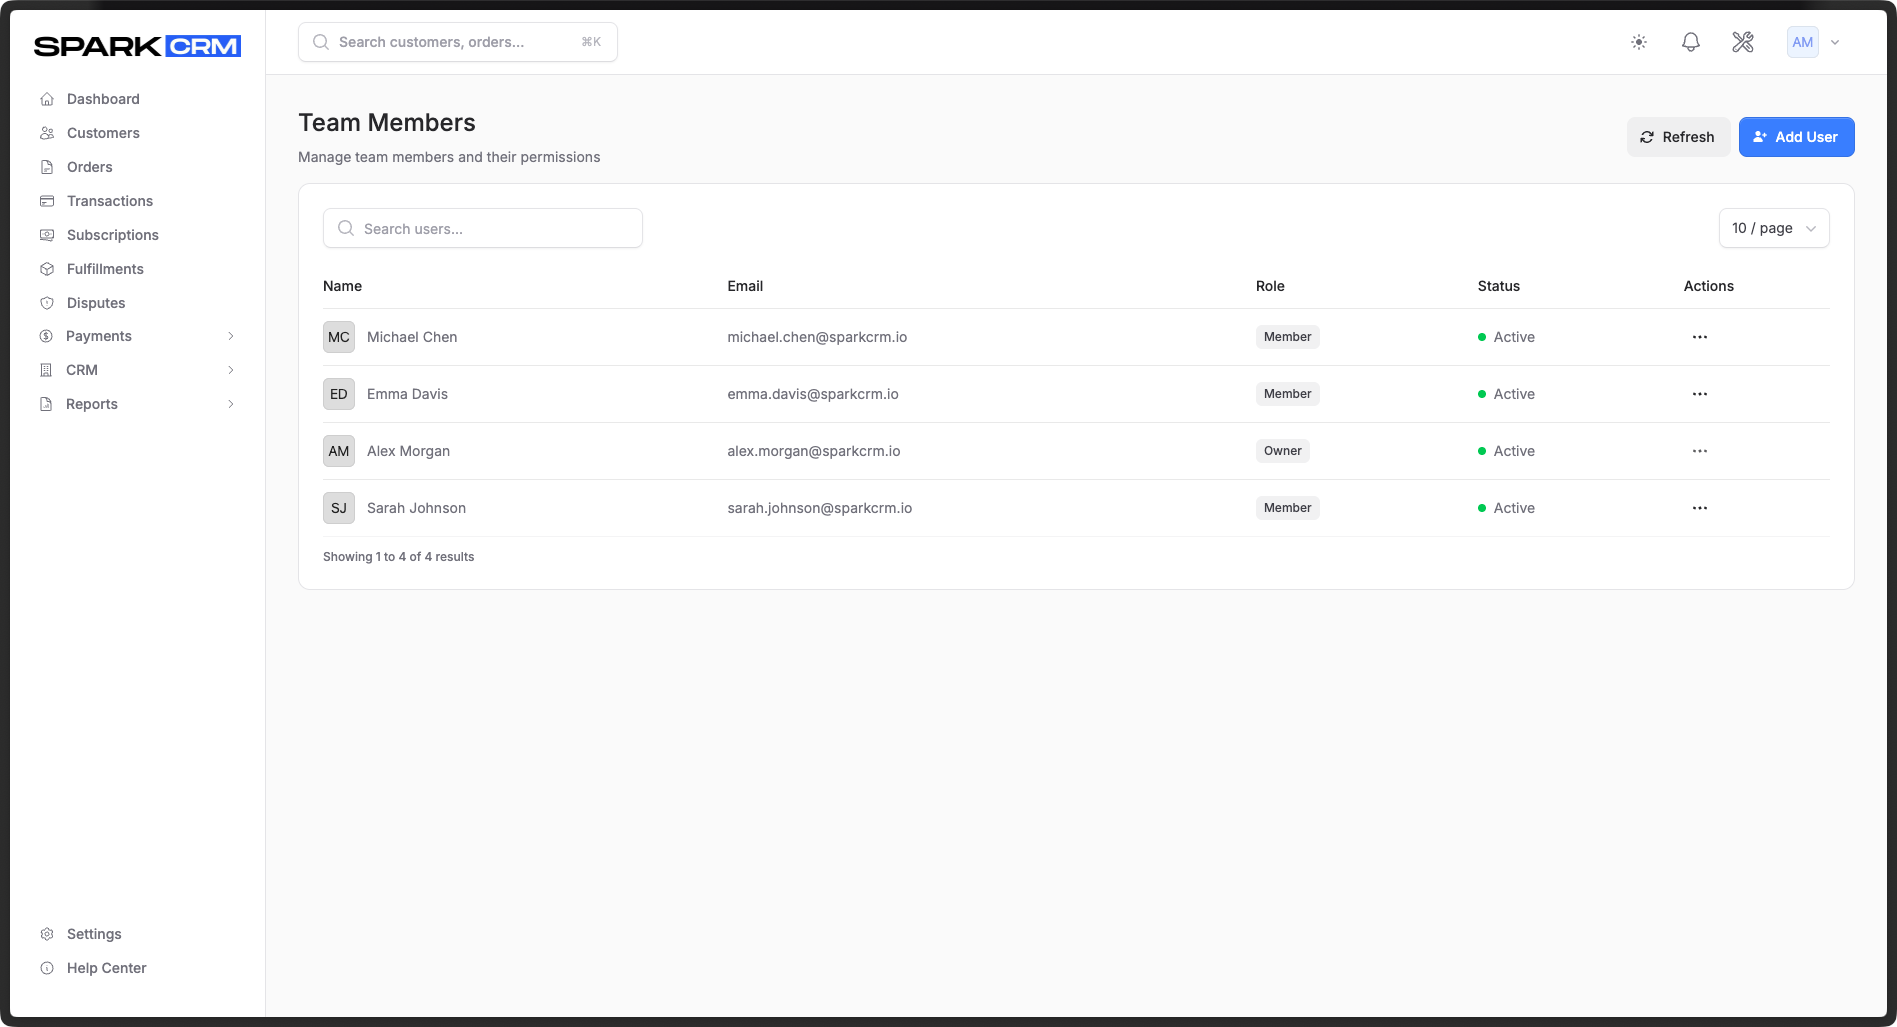 Screenshot: Manage your team members and assign roles with different permission levels
Notification Preferences
Control which notifications you receive:
- Go to Settings > Notifications
- Enable/disable notification types
- Configure email notification settings
Where to Go First
After initial configuration, we recommend this workflow:
Step 1: Payment Gateway
Location: Payments > Gateways
Connect at least one payment processor to accept payments:
- Authorize.net
- Stripe
- Other supported gateways
Step 2: Products
Location: CRM > Products
Create your product catalog:
- Add product name and description
- Set pricing
- Set up inventory if applicable
Step 3: Campaign
Location: CRM > Campaigns
Create your first campaign:
- Name your campaign
- Add products to the campaign
- Configure checkout settings
- Set up affiliate tracking (optional)
Step 4: Test Order
Process a test order to verify:
- Payment gateway works
- Products are configured correctly
- Fulfillment triggers properly
- Customer receives confirmation — only if the campaign has an active Auto Responder with the Order Confirmation trigger (campaign > Auto Responders). No confirmation email is sent otherwise
Quick Reference
| Task | Location |
|---|---|
| Enable/disable services | User menu > Billing > Manage Services |
| Add payment gateway | Payments > Gateways |
| Create products | CRM > Products |
| Create campaigns | CRM > Campaigns |
| View customers | Customers |
| View orders | Orders |
| View transactions | Transactions |
| Team timezone | User menu > your name (Profile) |
| Team/system preferences (SMTP, notifications, QA, webhooks) | Settings |
Next Steps
Now that your account is configured, learn about the Core Concepts to understand Spark CRM’s features in depth.