

Manage your team members, billing, and provider relationships.
Team Structure
Spark CRM uses a team-based structure:
Team (Account)
├── Team Owner (the user recorded in teams.user_id)
├── Team Members
│   ├── Account Admin
│   ├── Account Manager
│   ├── Customer Support Level 2
│   ├── Customer Support Level 1
│   └── Affiliate
├── Connected Providers
│   ├── Customer Service
│   └── Affiliate
└── Billing & Subscription
Team Members
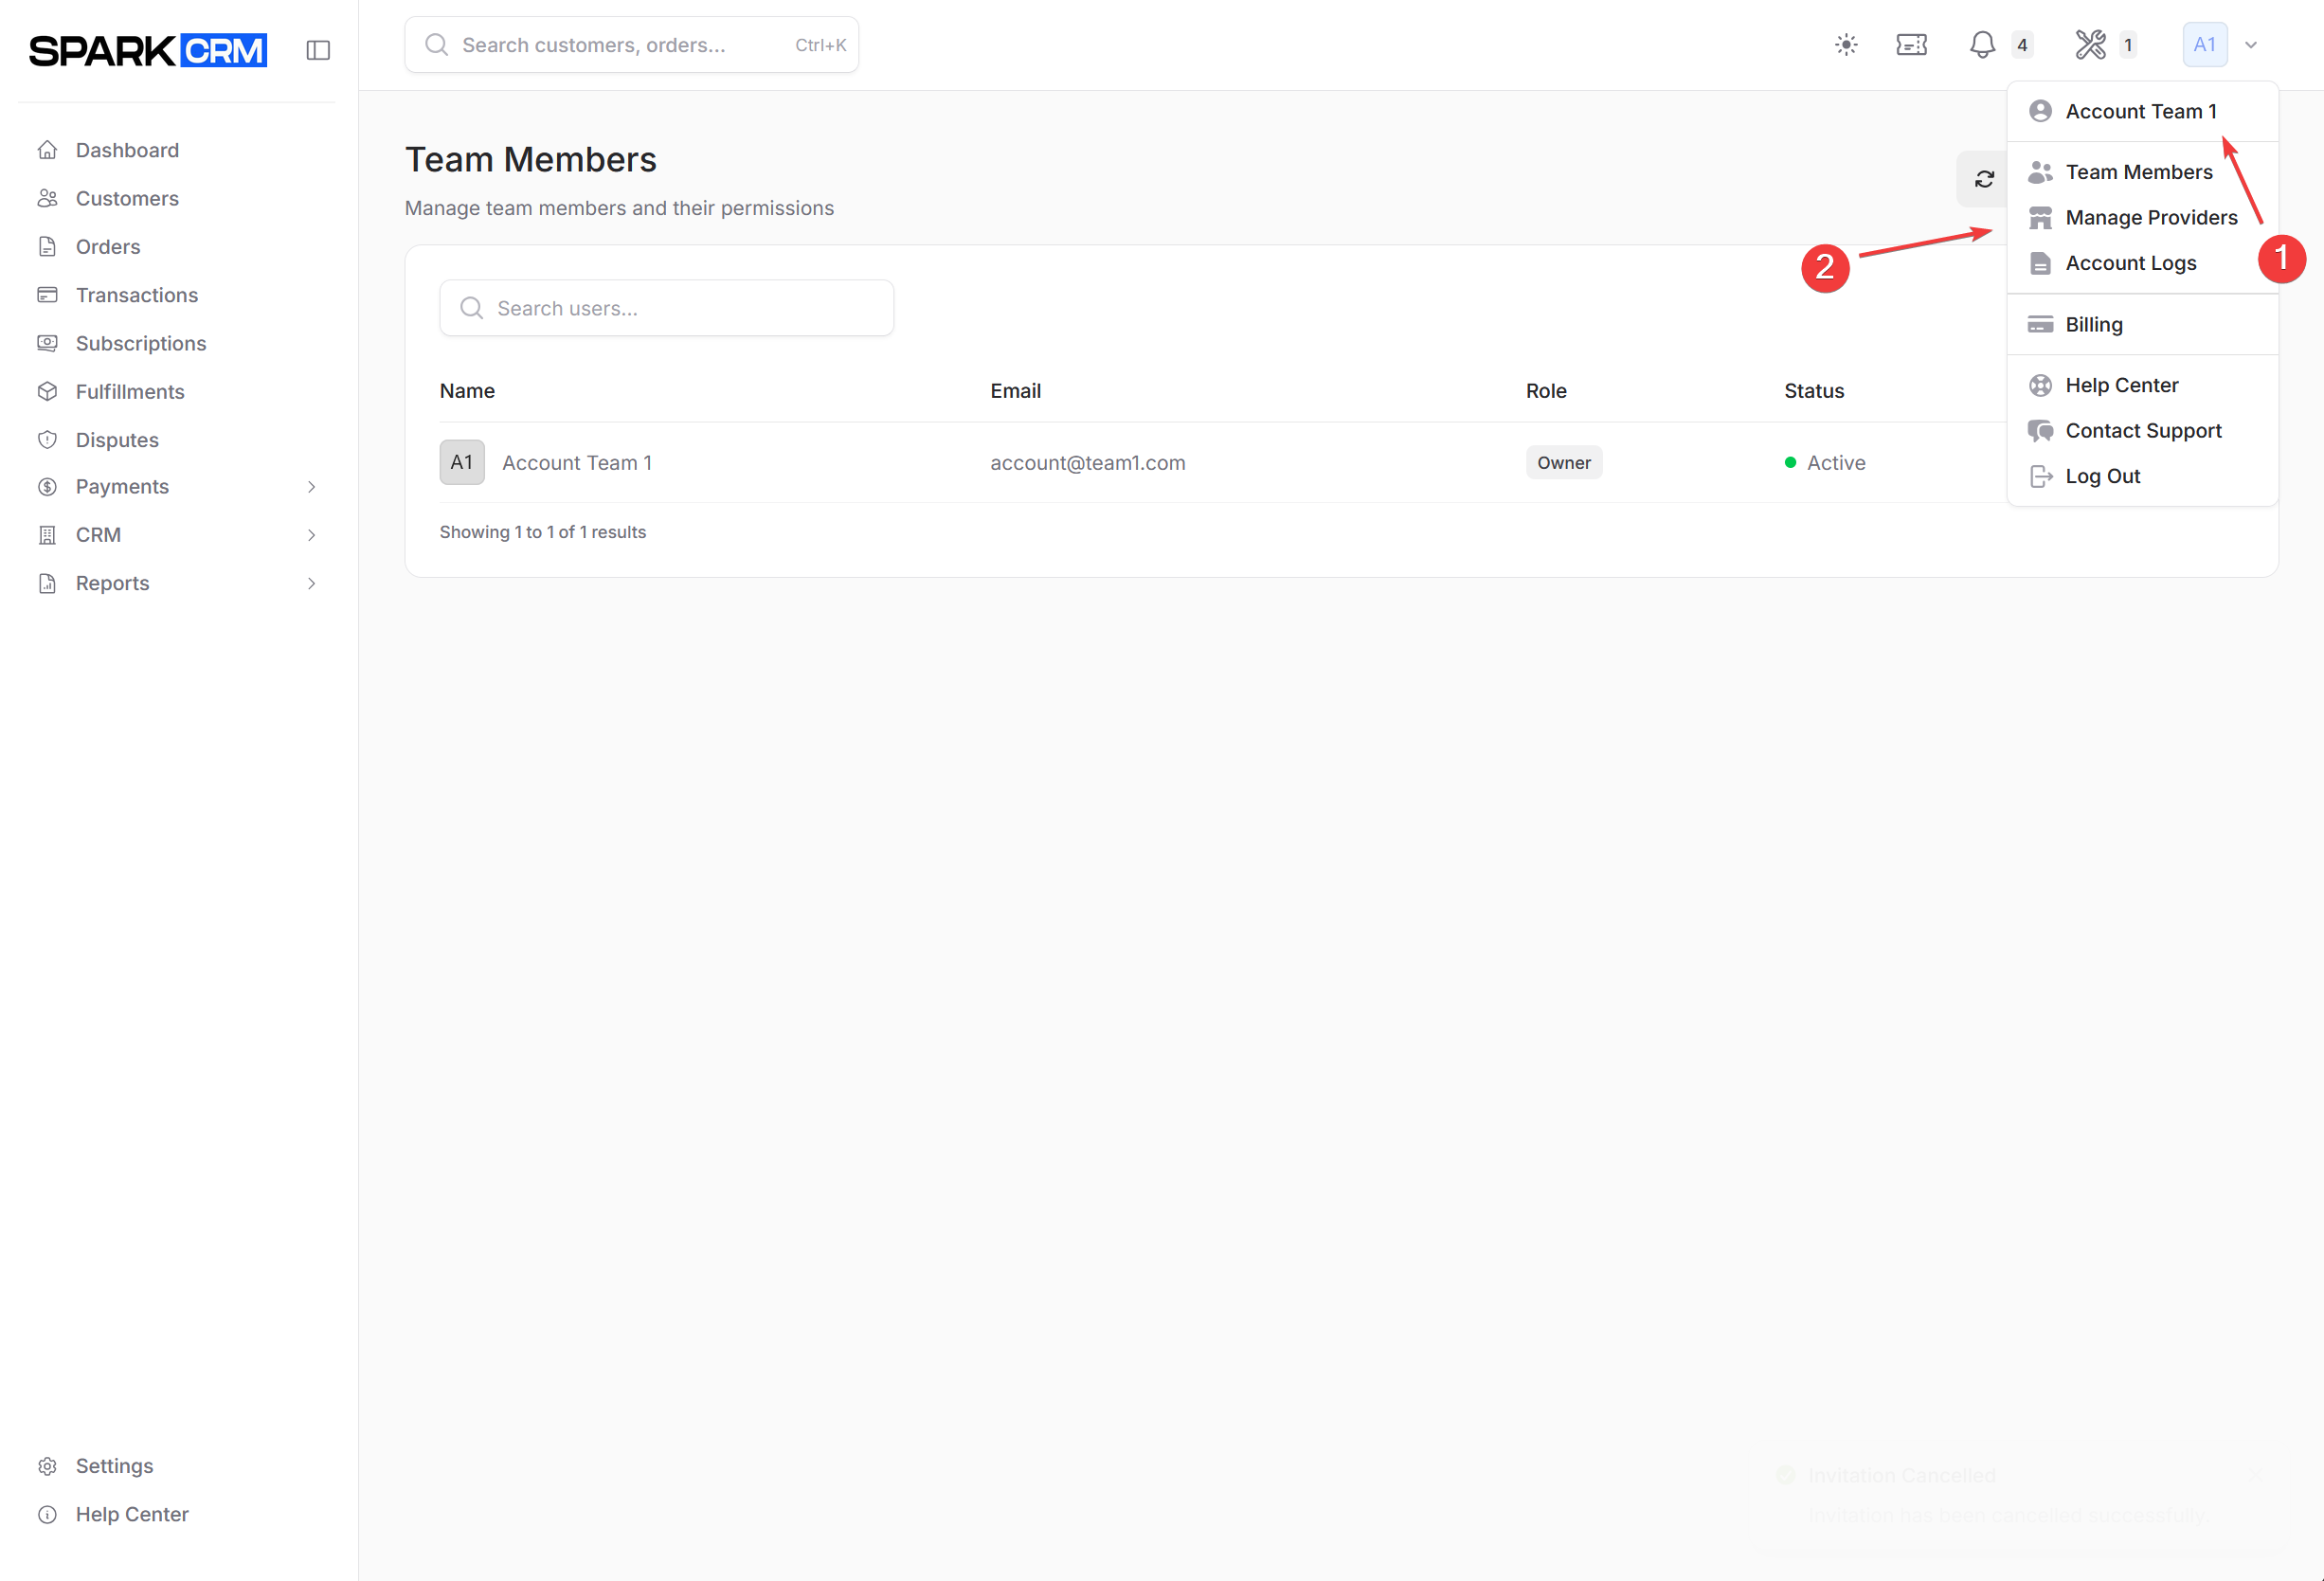
Navigation: User Icon (top right) > Team Members (direct URL: /team/manage)
Roles
| Role | Description |
|---|---|
| Account Admin | Full access to all team data, team members and API tokens, including billing and payment methods |
| Account Manager | Full access to all team data, but cannot add or change team members, manage API tokens, or access billing |
| Customer Support Level 2 | Everything Level 1 can do, plus creating customers, orders and subscriptions, and marking transactions as chargebacks |
| Customer Support Level 1 | Search customers, view and update orders/subscriptions/fulfillments, process refunds and voids, issue RMAs, reship fulfillments, resend autoresponders |
| Affiliate | Read-only access to affiliate sales reports, limited to the affiliate IDs assigned to that member |
Each role carries a fixed permission set defined by the platform; permissions cannot be adjusted per member.
The team owner (the user in teams.user_id) is separate from these roles and always has full control, including billing.
Inviting Team Members
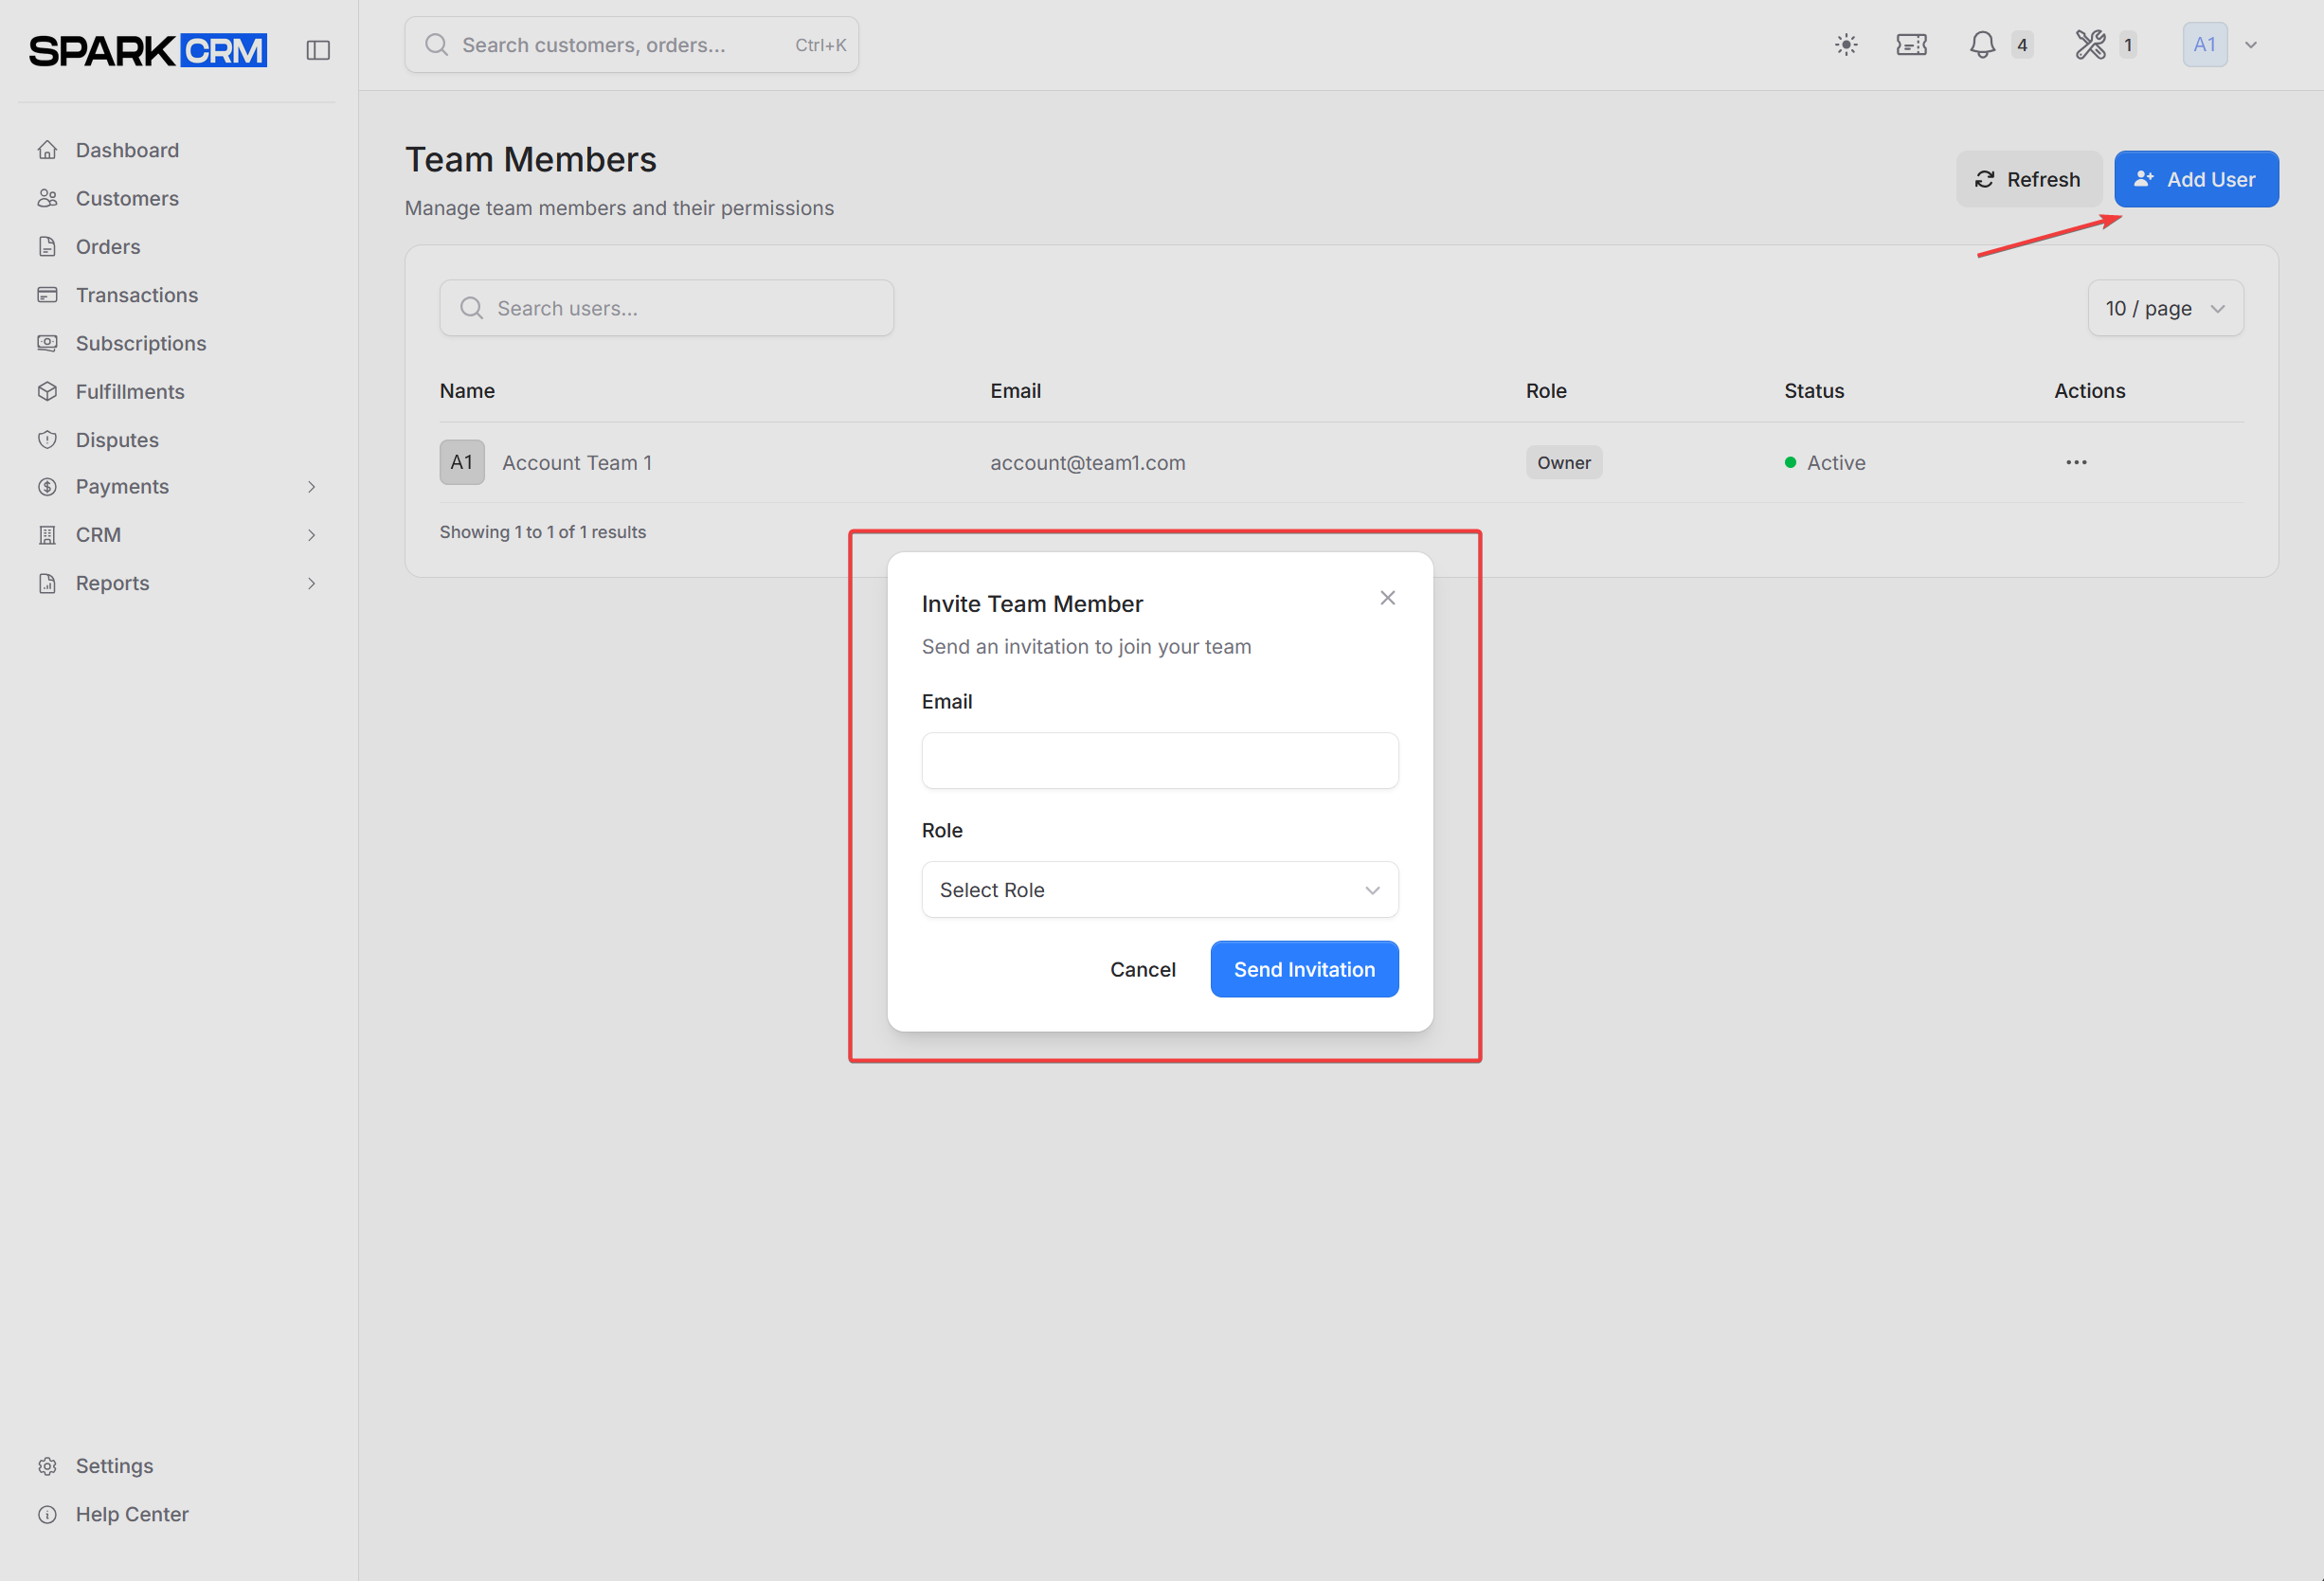
- Click the user icon (top right) and choose Team Members
- Click Add User
- Enter email address
- Select role
- If you selected the Affiliate role, choose which affiliate IDs this member may see in their reports (this is the only per-member setting — every other permission comes from the role)
- Click Send Invitation
Role Permissions
A member’s access is determined entirely by the role you assign — there are no per-member permission switches. The abilities below come bundled with specific roles:
| Permission | Description | Roles that have it |
|---|---|---|
| View Billing | Can see billing information | Team owner, Account Admin |
| Manage Billing | Can update payment methods | Team owner, Account Admin |
| View Users | Can see team members | Team owner, Account Admin |
| Manage Providers | Can connect service providers | Team owner, Account Admin |
| View Logs | Can see account logs | Team owner, Account Admin, Account Manager |
| View Revenue | Can see revenue on dashboard | Team owner, Account Admin, Account Manager |
| View Orders | Can see orders on the dashboard | Team owner, Account Admin, Account Manager |
For the Affiliate role only, you additionally choose which affiliate IDs the member may see in their reports.
Removing Team Members
- Find the member in the list
- Click Remove or … menu
- Confirm removal
Billing
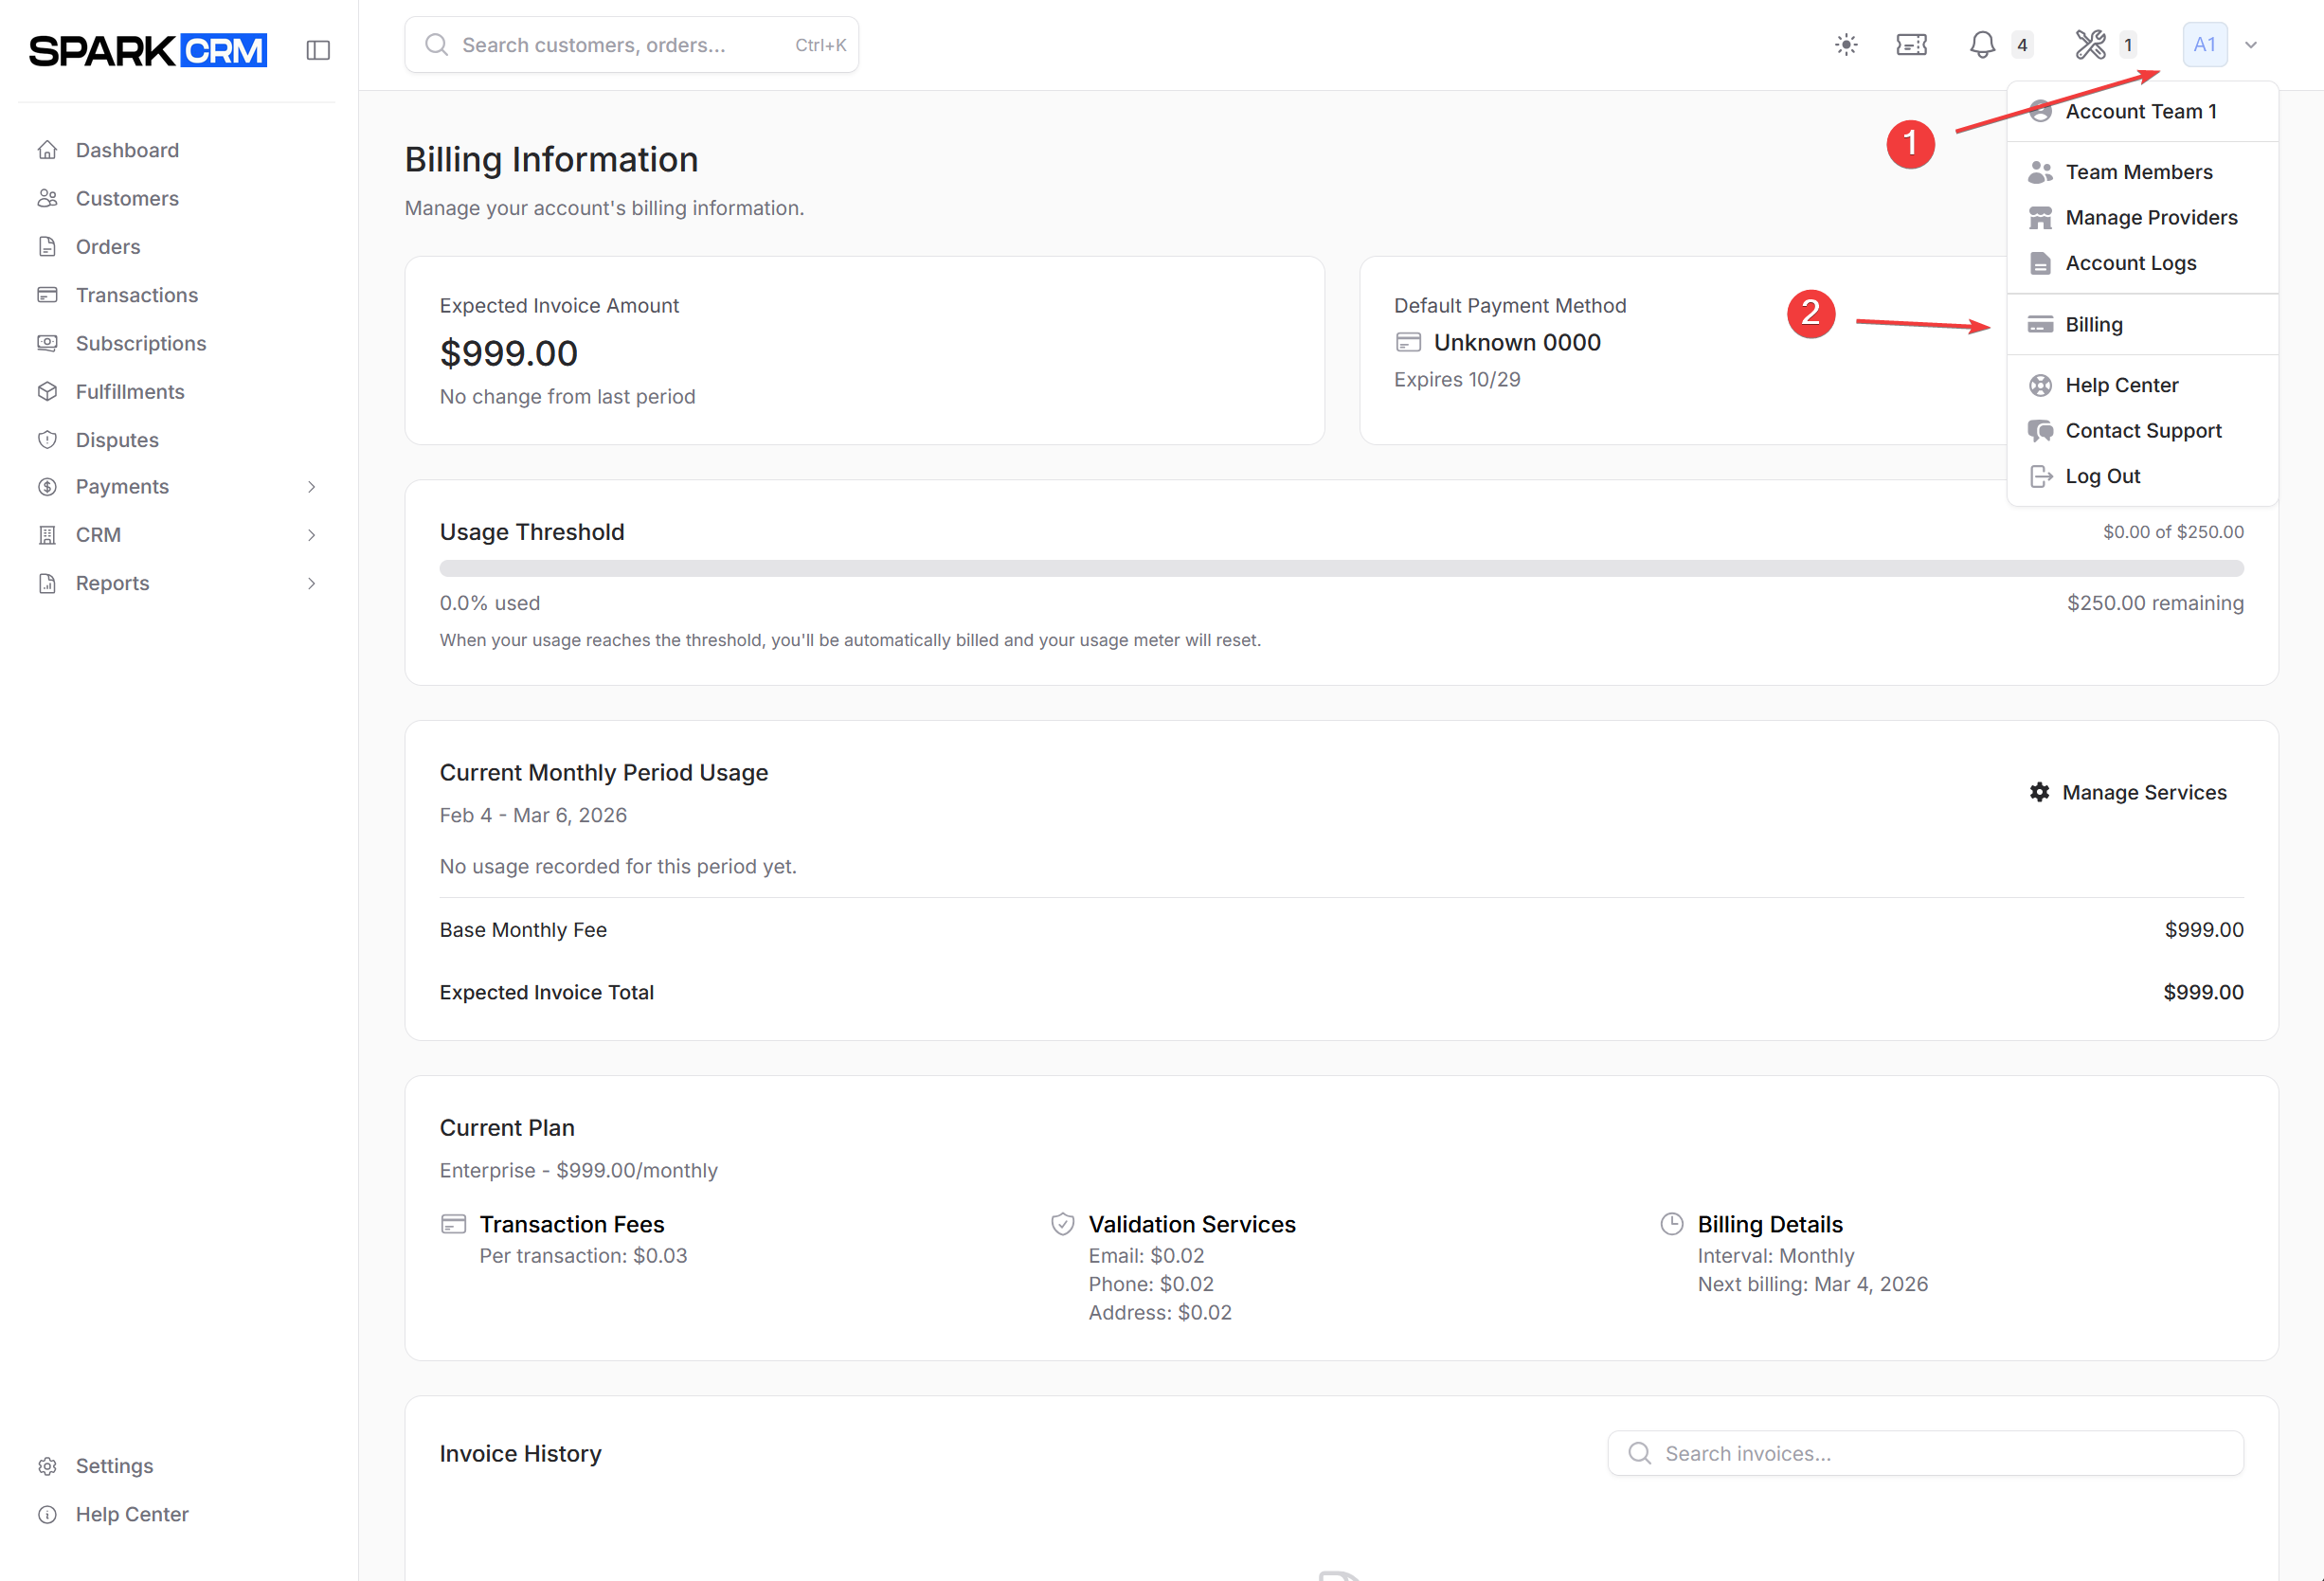
Navigation: Account (top right) >> Billing
Plan Details
View your current subscription:
- Plan name and features
- Monthly fee
- Service fees
- Usage-based charges
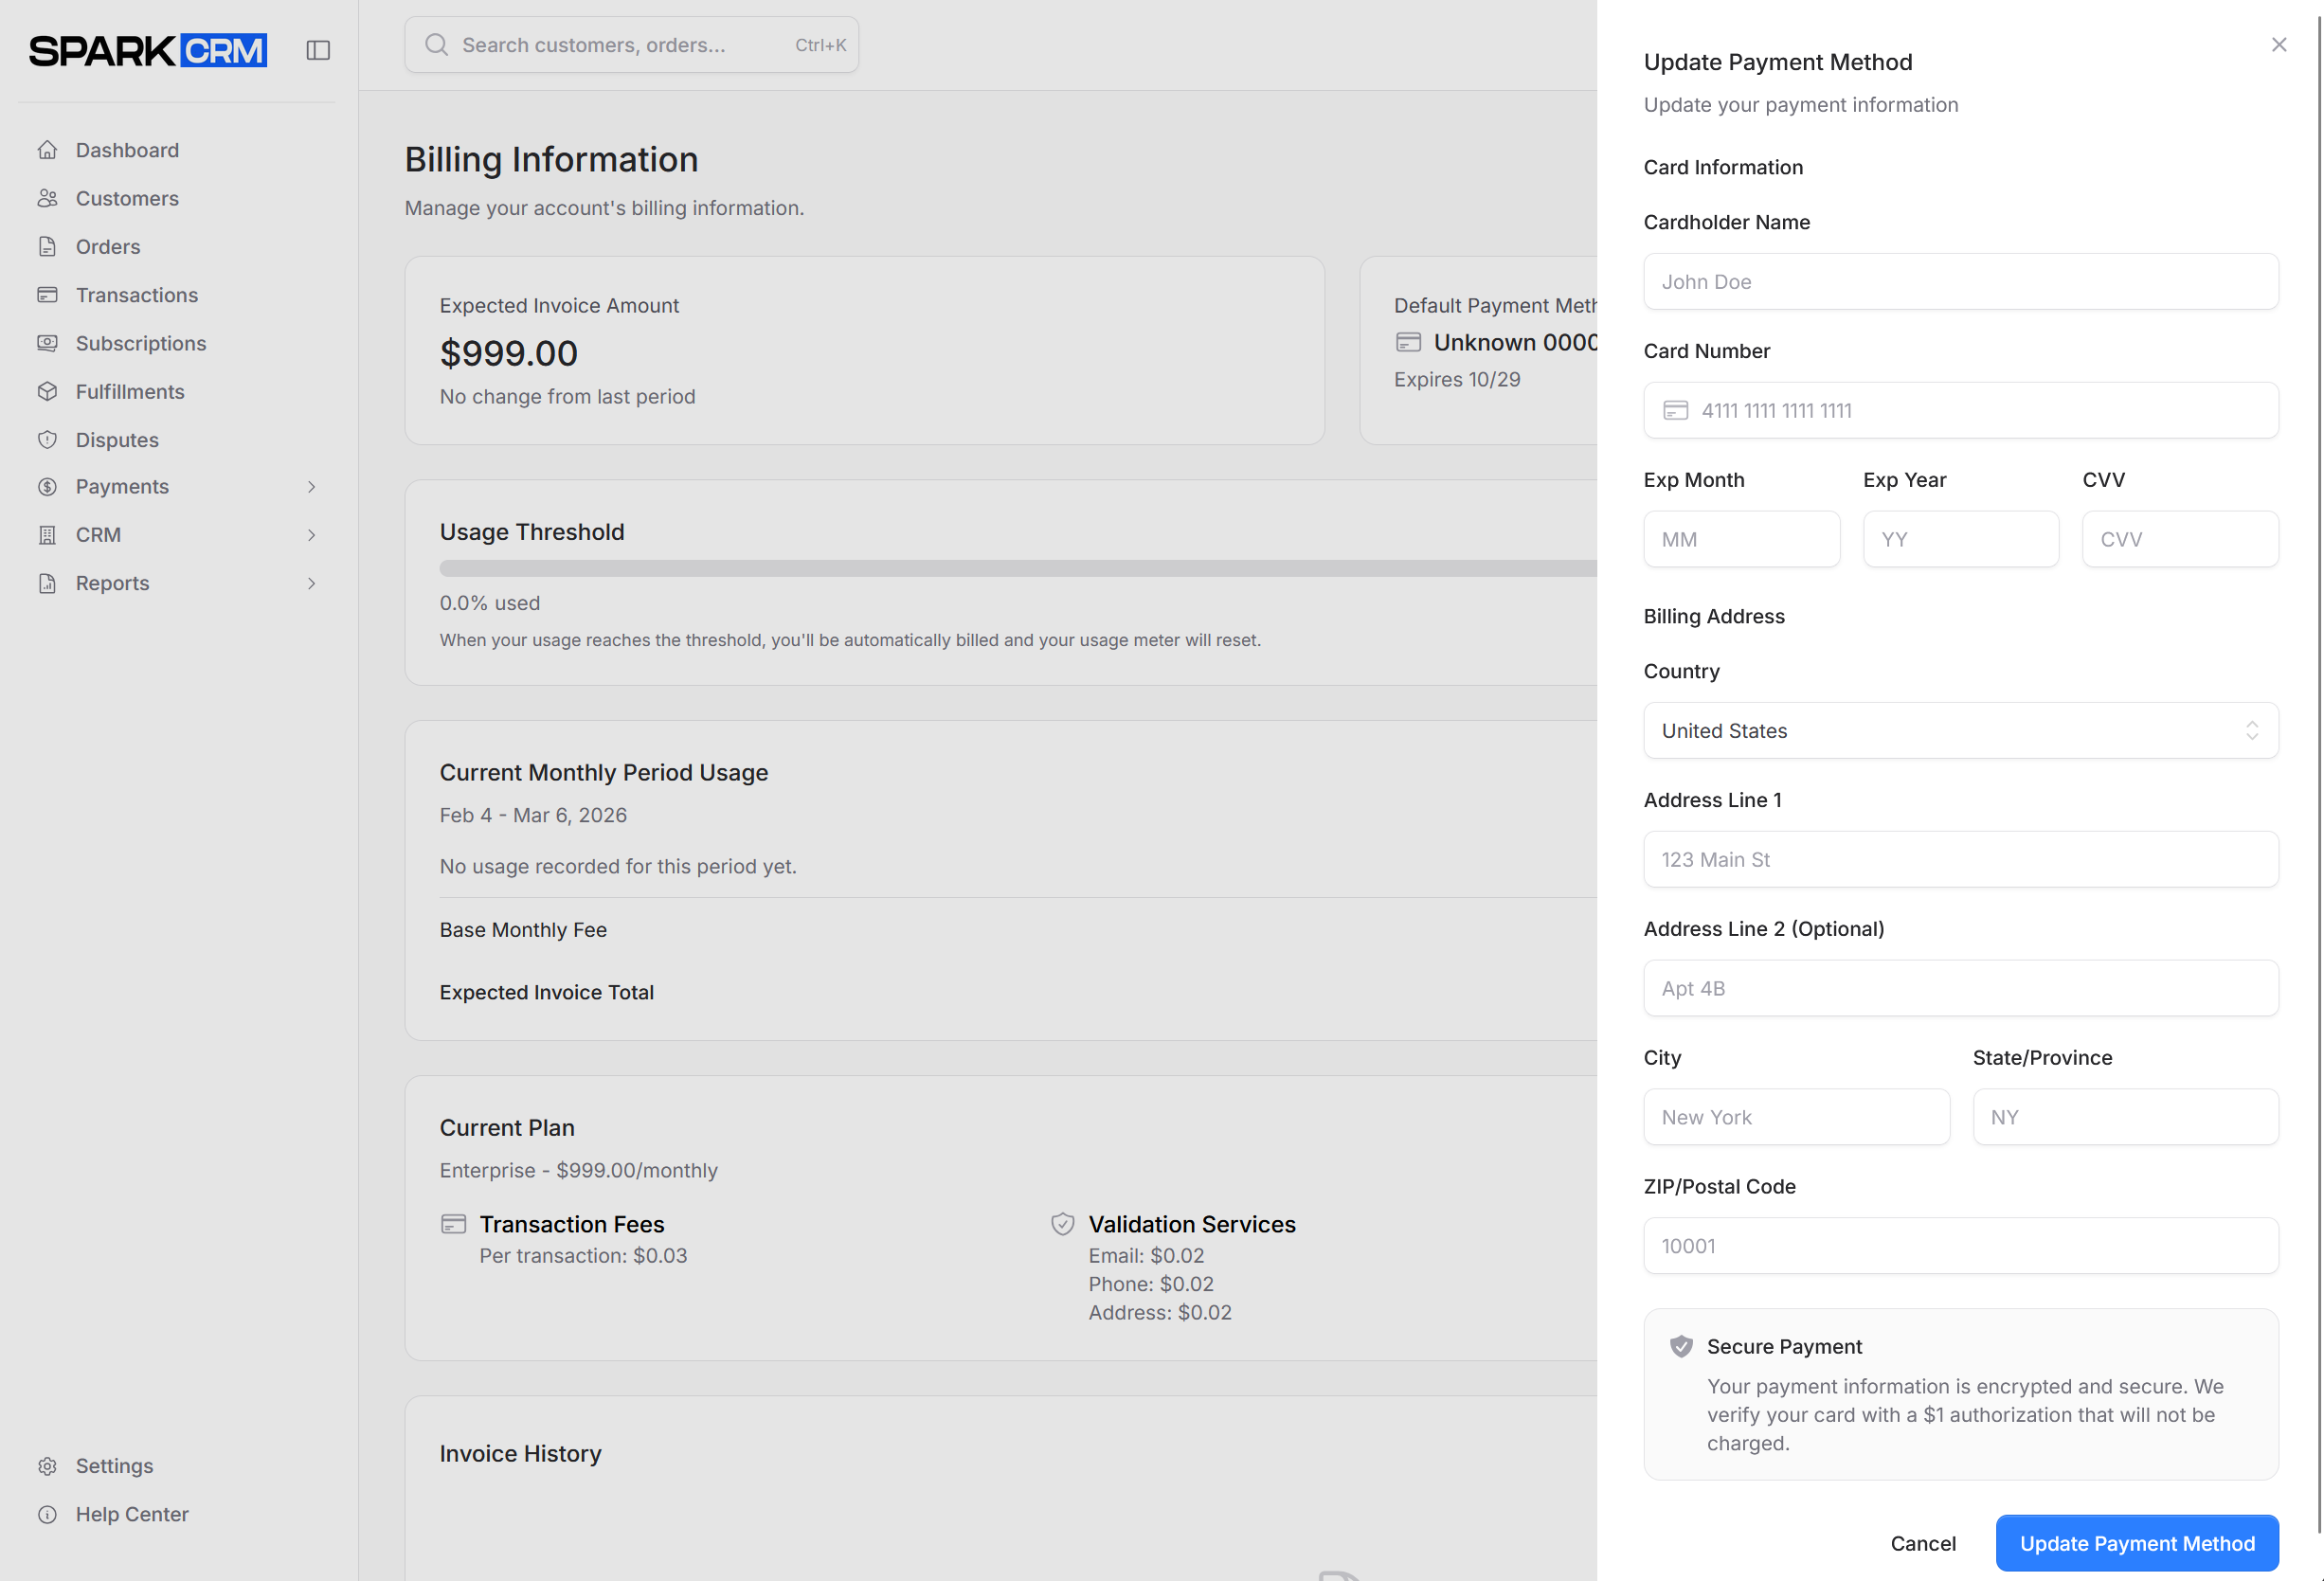
Payment Methods
Manage payment methods for your subscription:
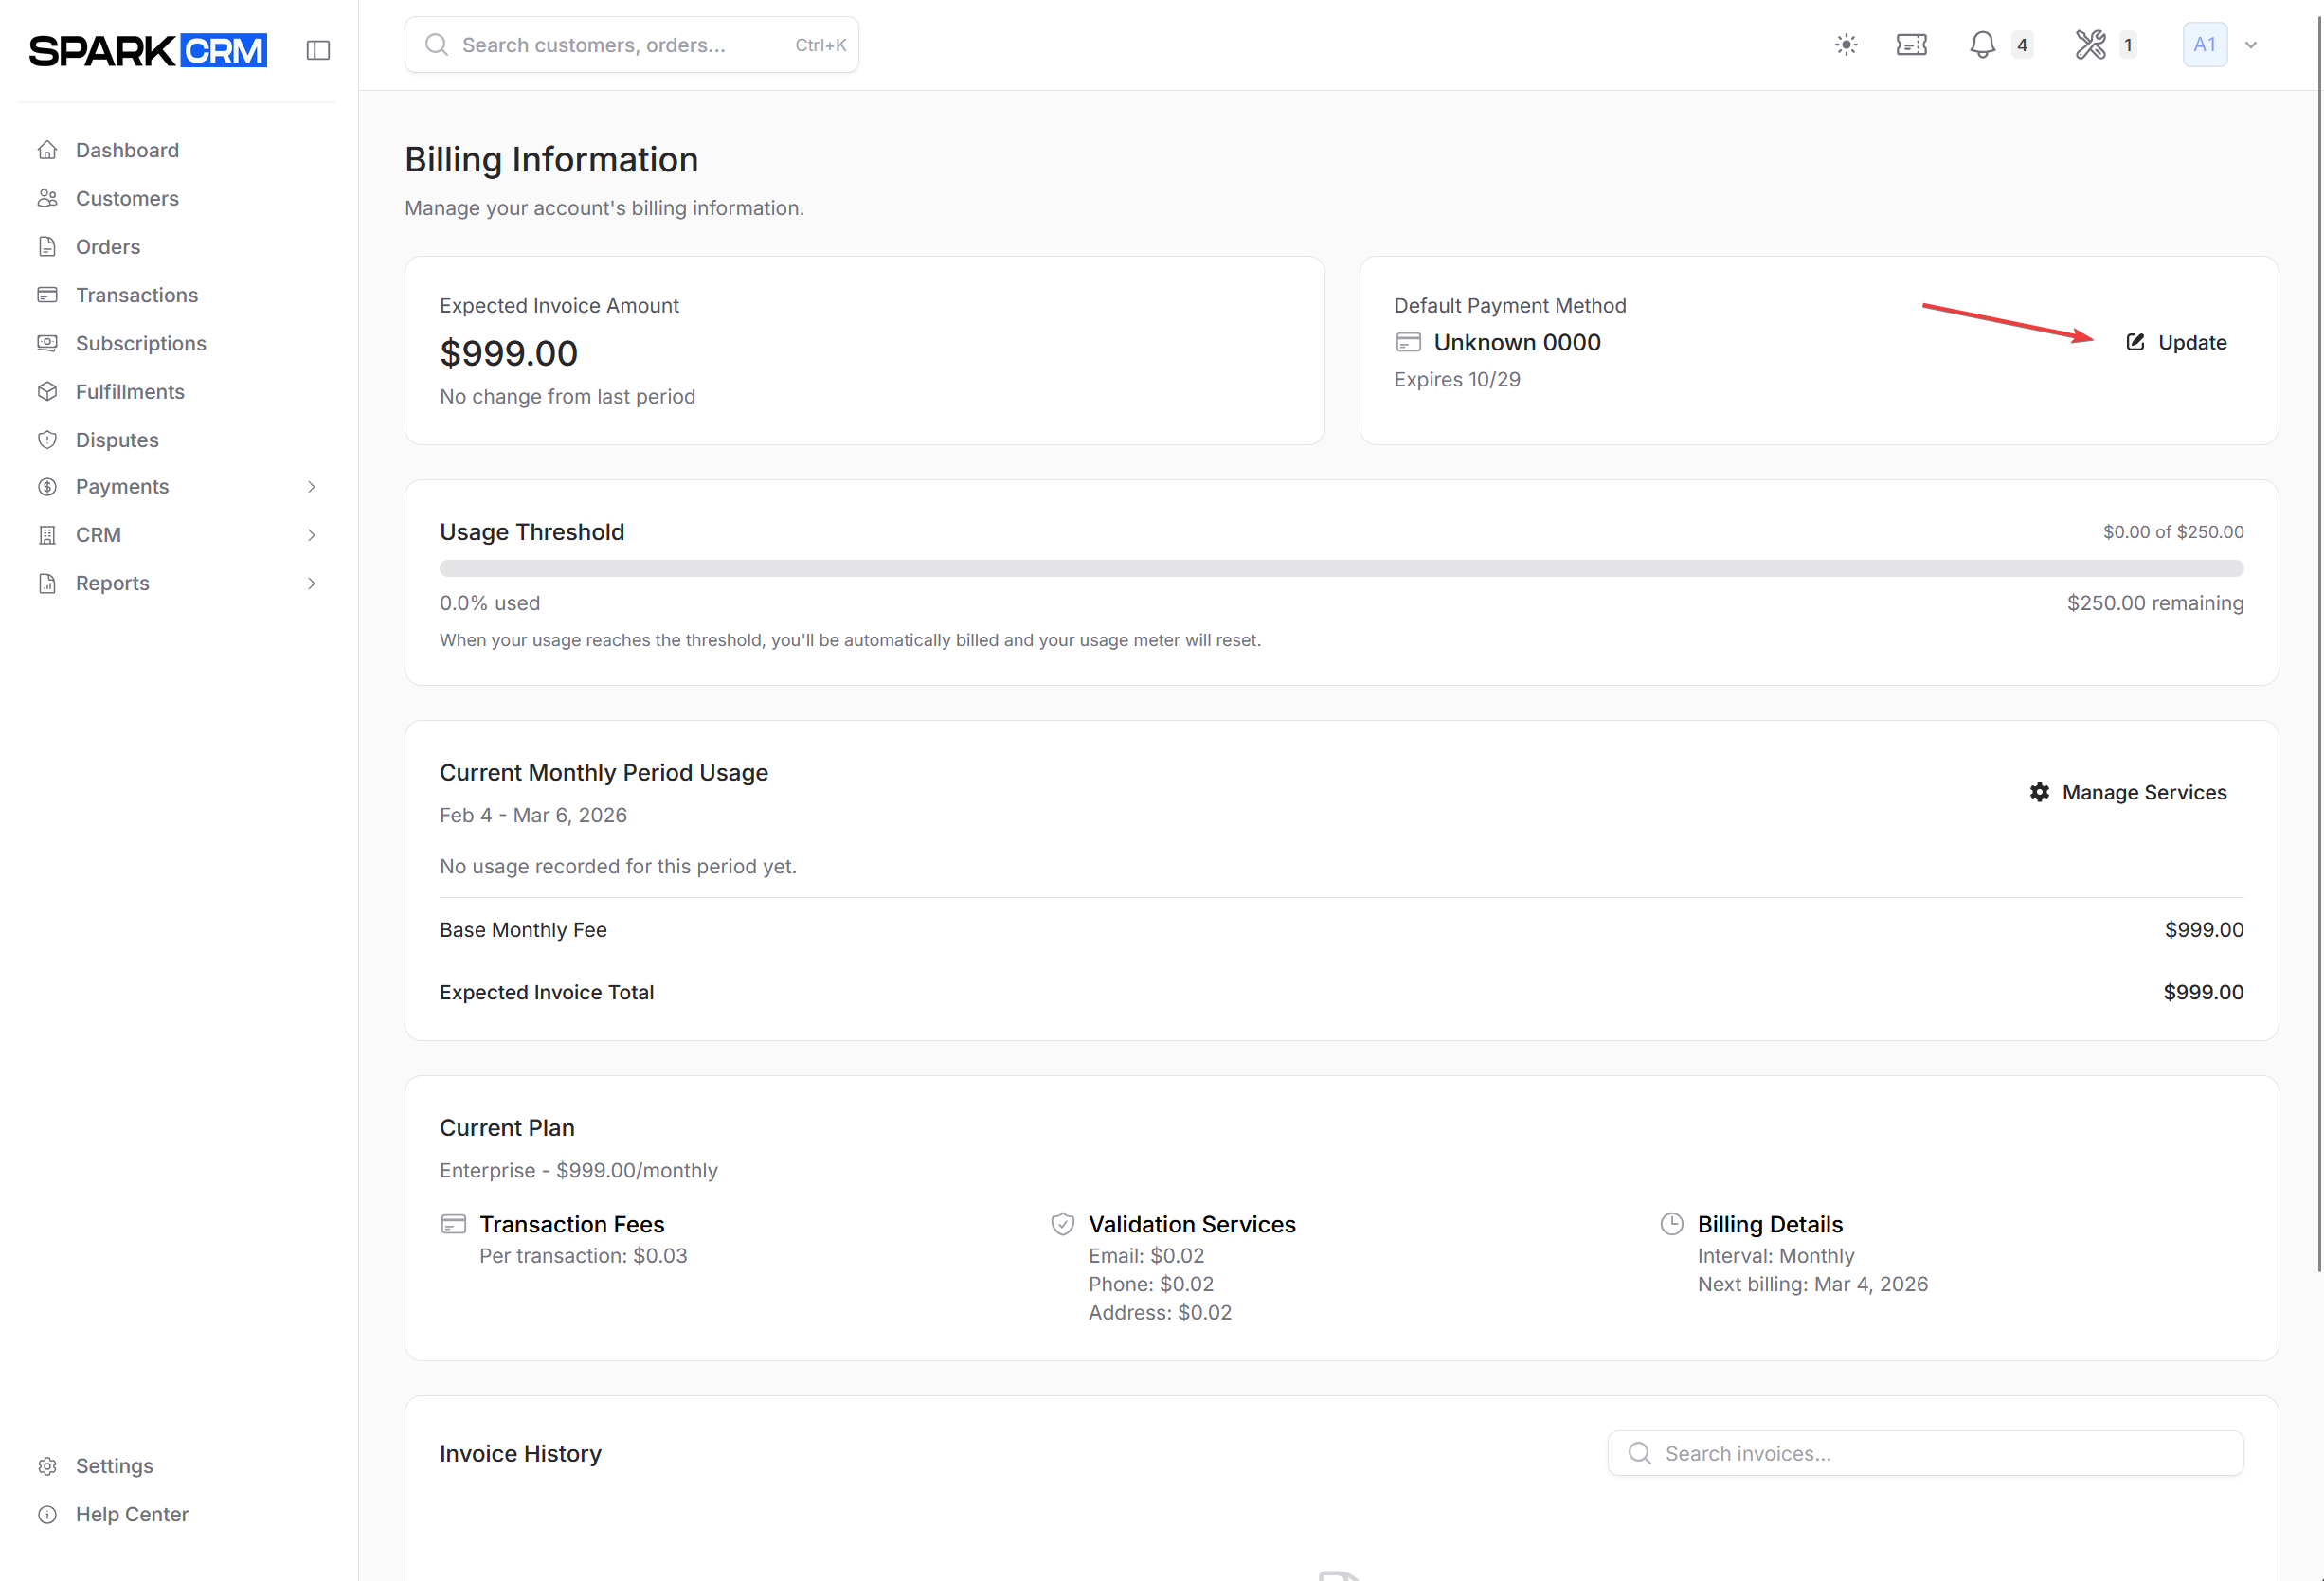
- Go to Billing
- Click Payment Methods > Update
- Enter the card number, expiration and CVC, then click Save Payment Method
Invoices
View and download invoices:
- Go to Billing
- Scroll to Invoice History
- Use the row actions: click the download icon to save the invoice PDF, or the retry icon to re-attempt payment on a pending or failed invoice
Usage & Charges
Track service usage:
- Validation services (per verification)
- Email AI (per ticket)
- Tracking (per shipment)
- Transaction fees
Providers
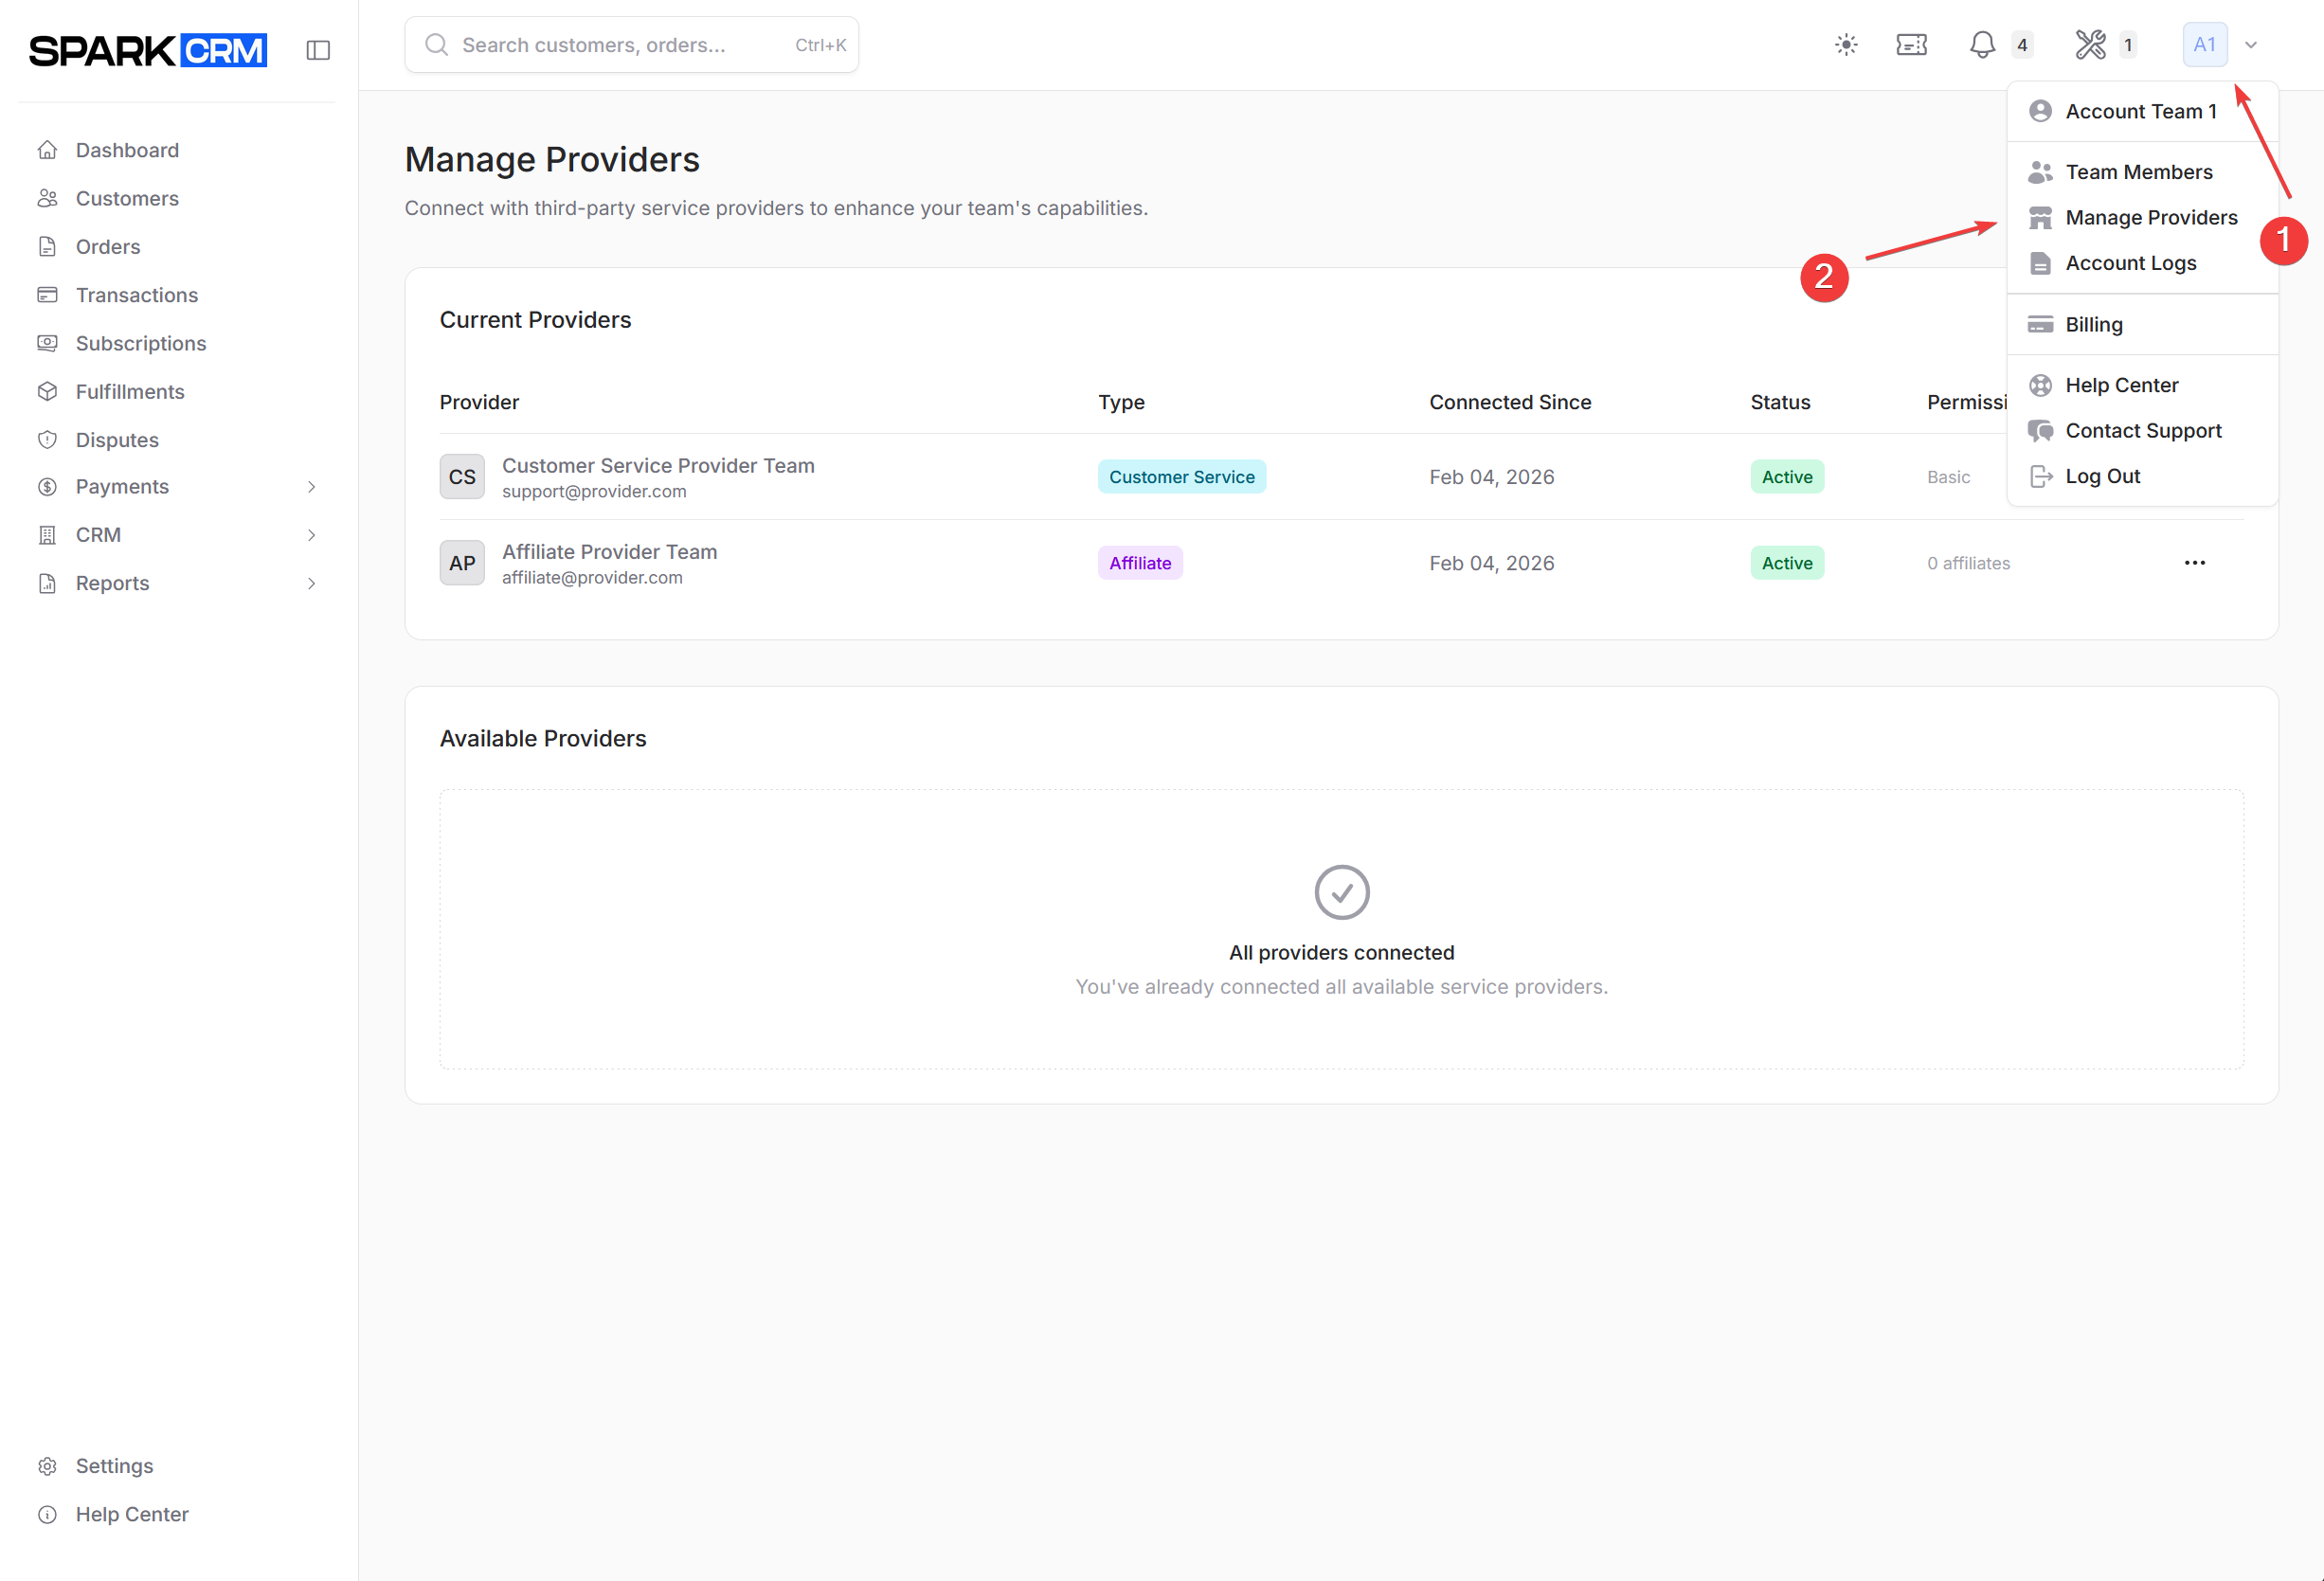
Navigation: User Icon (top right) > Manage Providers
Providers are third-party teams that can access your account for specific services.
Provider Types
| Type | Description |
|---|---|
| Customer Service | Handle orders, support |
| Affiliate | Manage affiliate relationships |
Connecting a Provider
- Click the user icon (top right) and choose Manage Providers
- Find the provider in the Available Providers table
- Click Connect Provider, review the summary of what that provider type will be able to do, then click Grant Access
- After connecting, open the provider’s … menu and choose Configure Permissions (Customer Service providers only) to set Outbound Sales Provider, Custom AffID, Can Set Webhooks, Can Create Campaigns and Can Create Coupons. Affiliate providers get Manage Affiliates instead.
You can only connect provider teams that already exist and are active on the platform — there is no invitation flow and no way to enter provider details yourself. The provider’s type is a property of that provider team and is shown as a badge on the row; you do not choose it.
Provider Permissions
The Configure Permissions modal applies to Customer Service providers and offers these settings:
| Permission | Description |
|---|---|
| Outbound Sales Provider | Marks the provider as performing outbound sales, assigns them a Custom AffID used for order attribution, and unlocks the webhook, campaign and coupon permissions below |
| Custom AffID | The affiliate ID stamped on orders the provider generates (available once Outbound Sales Provider is enabled) |
| Can Set Webhooks | Lets the provider create and manage webhooks for your account |
| Can Create Campaigns | Lets the provider view, create and manage campaigns for your account — there is no view-only option |
| Can Create Coupons | Lets the provider create variable pricing coupons for your account |
Order visibility for a Customer Service provider follows that provider user’s own role (Provider Admin / Customer Support Level 1 / Level 2) and cannot be toggled per connection. The same is true of manual order creation.
Reports are not a per-provider permission either. A Customer Service provider gets reports only once Outbound Sales Provider is enabled, and even then only for the provider’s team owner and Provider Admins.
Managing Providers
- Activate/Deactivate: Toggle provider access
- Configure Permissions: Adjust the settings above for an active Customer Service provider
- Remove Provider: Disconnect provider
Notifications
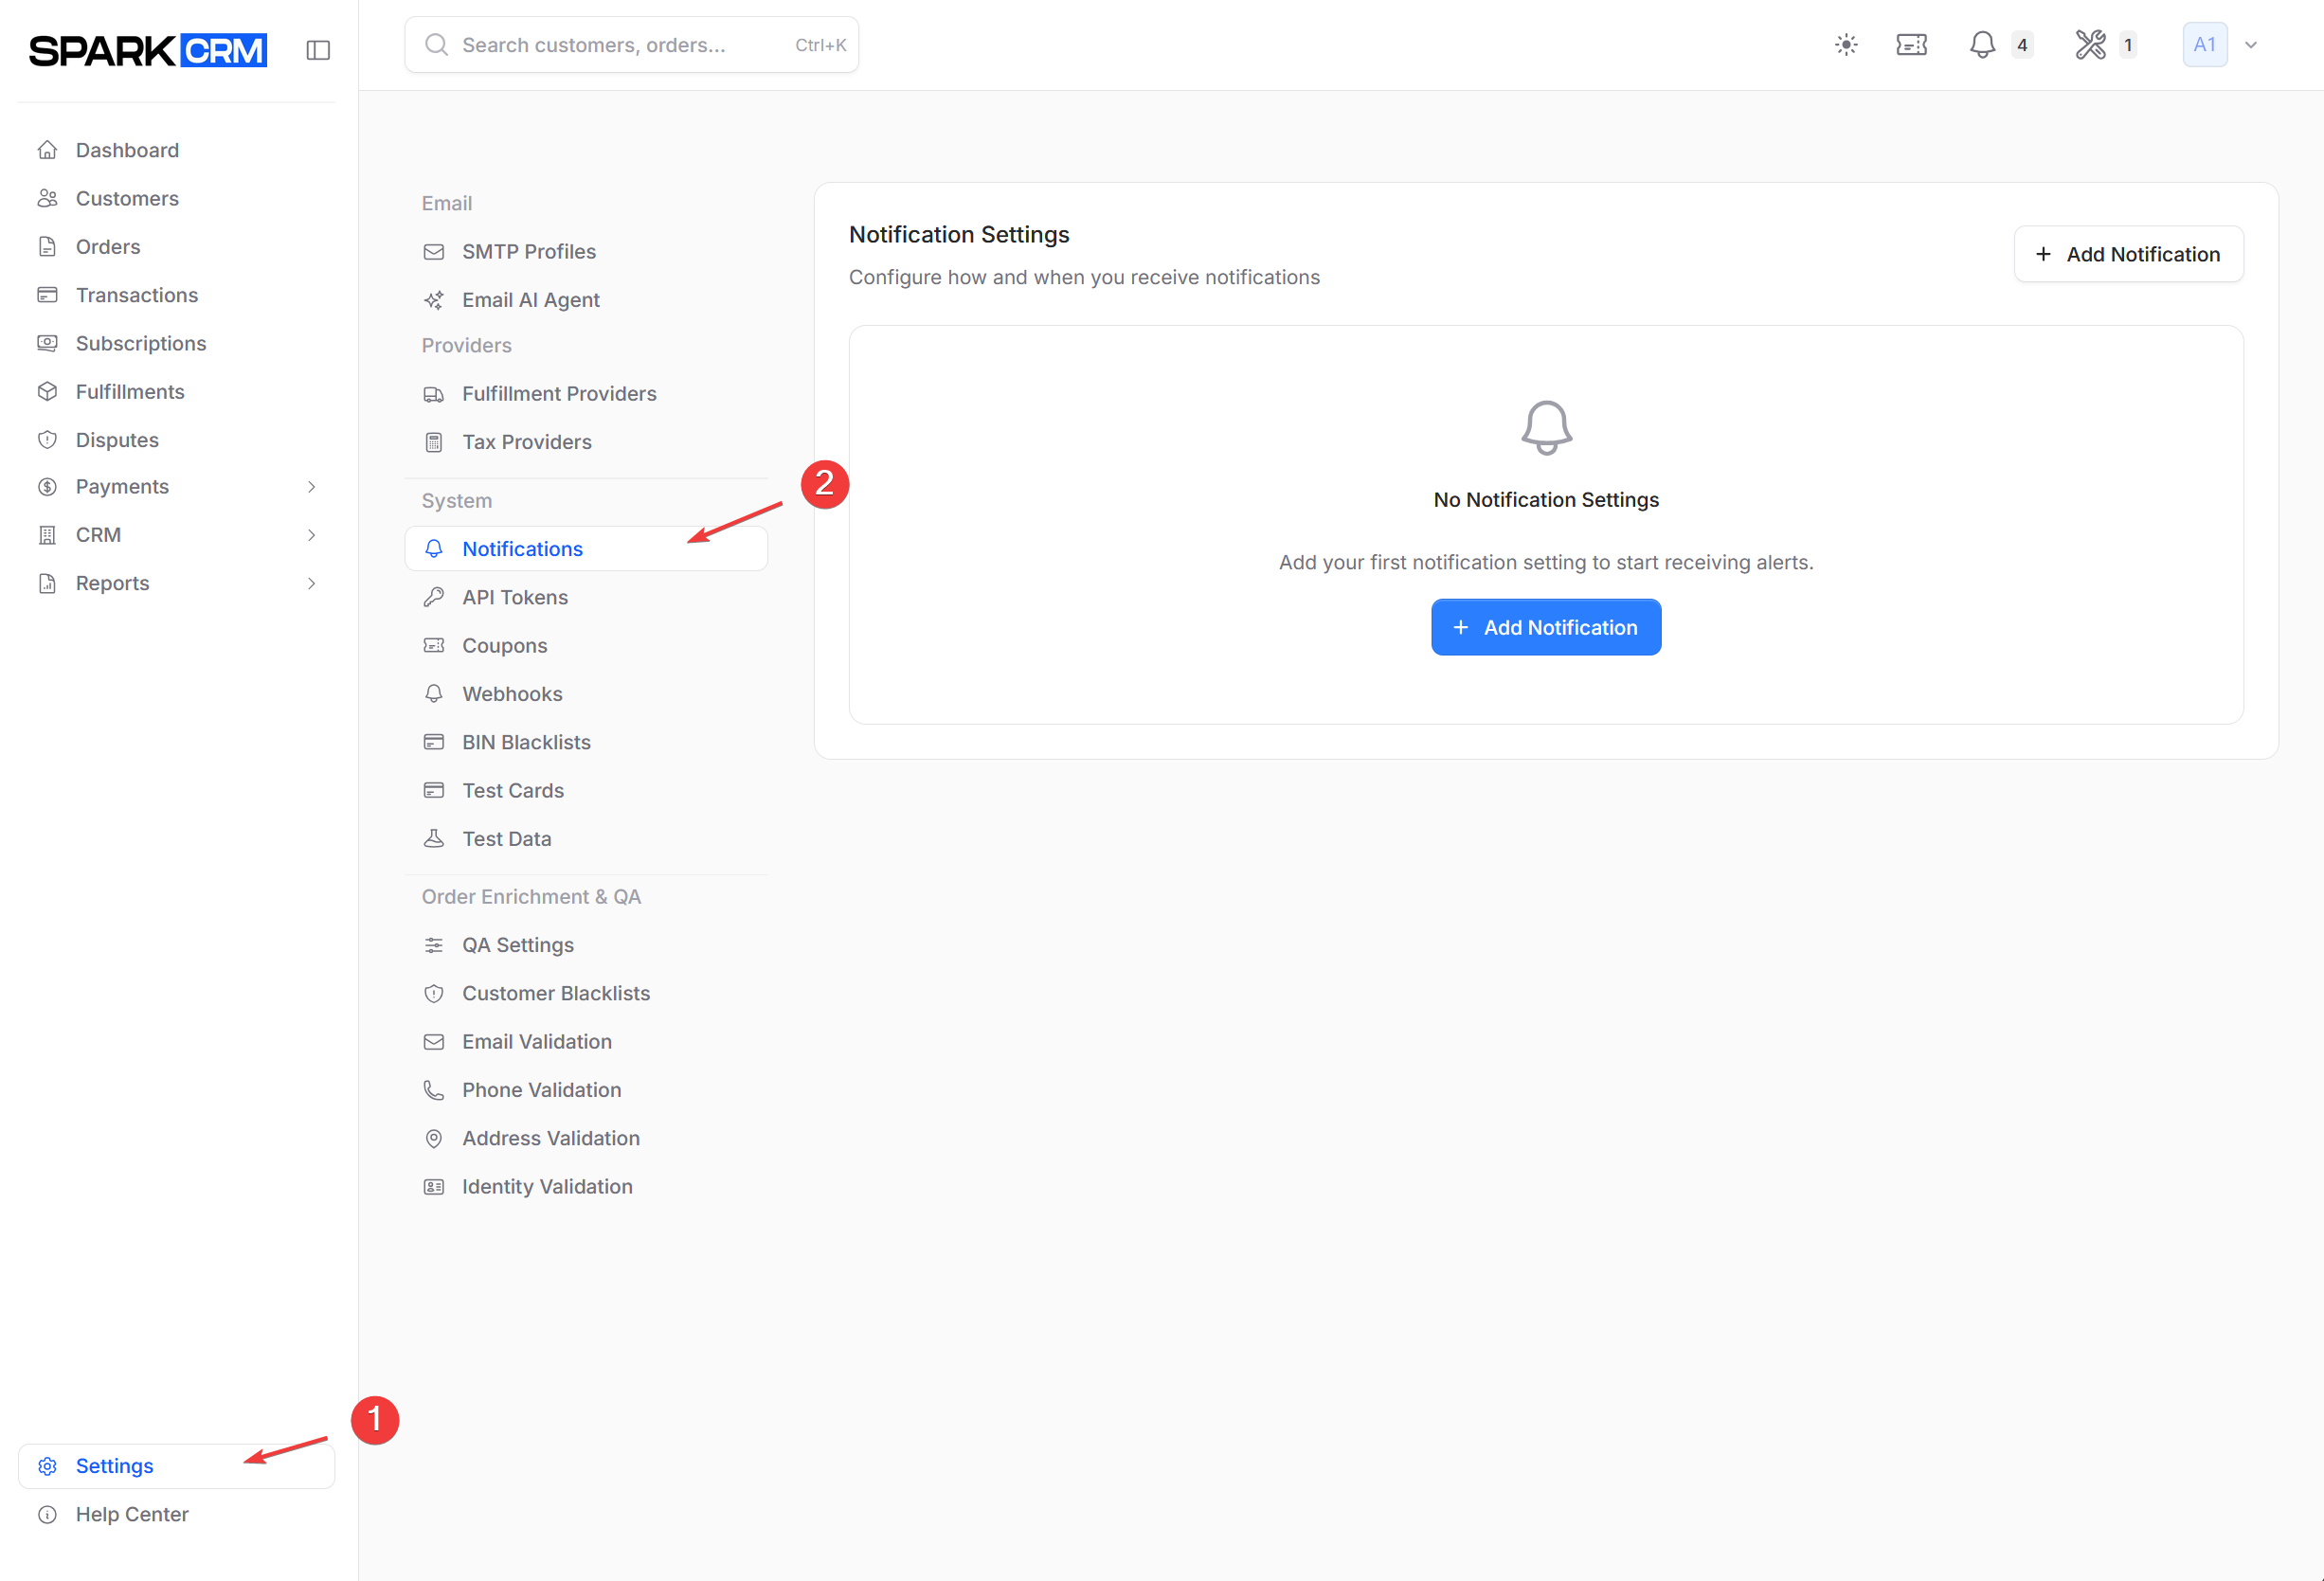
Navigation: Settings (sidebar) > Notifications
Configure team notification preferences:
Notification Settings
- Email, SMS or Slack notifications for operational events — gateway and orchestrator capacity, gateway/webhook/email-inbox auto-disable, manual gateway deactivation, consecutive declines, SMTP failures, fulfillment failures and disabled fulfillment providers, delayed shipments, QA review required, unresolved disputes, and AI support-ticket escalations
- Alert thresholds
- Recipient management
See Notifications Settings for details.
Team Switcher
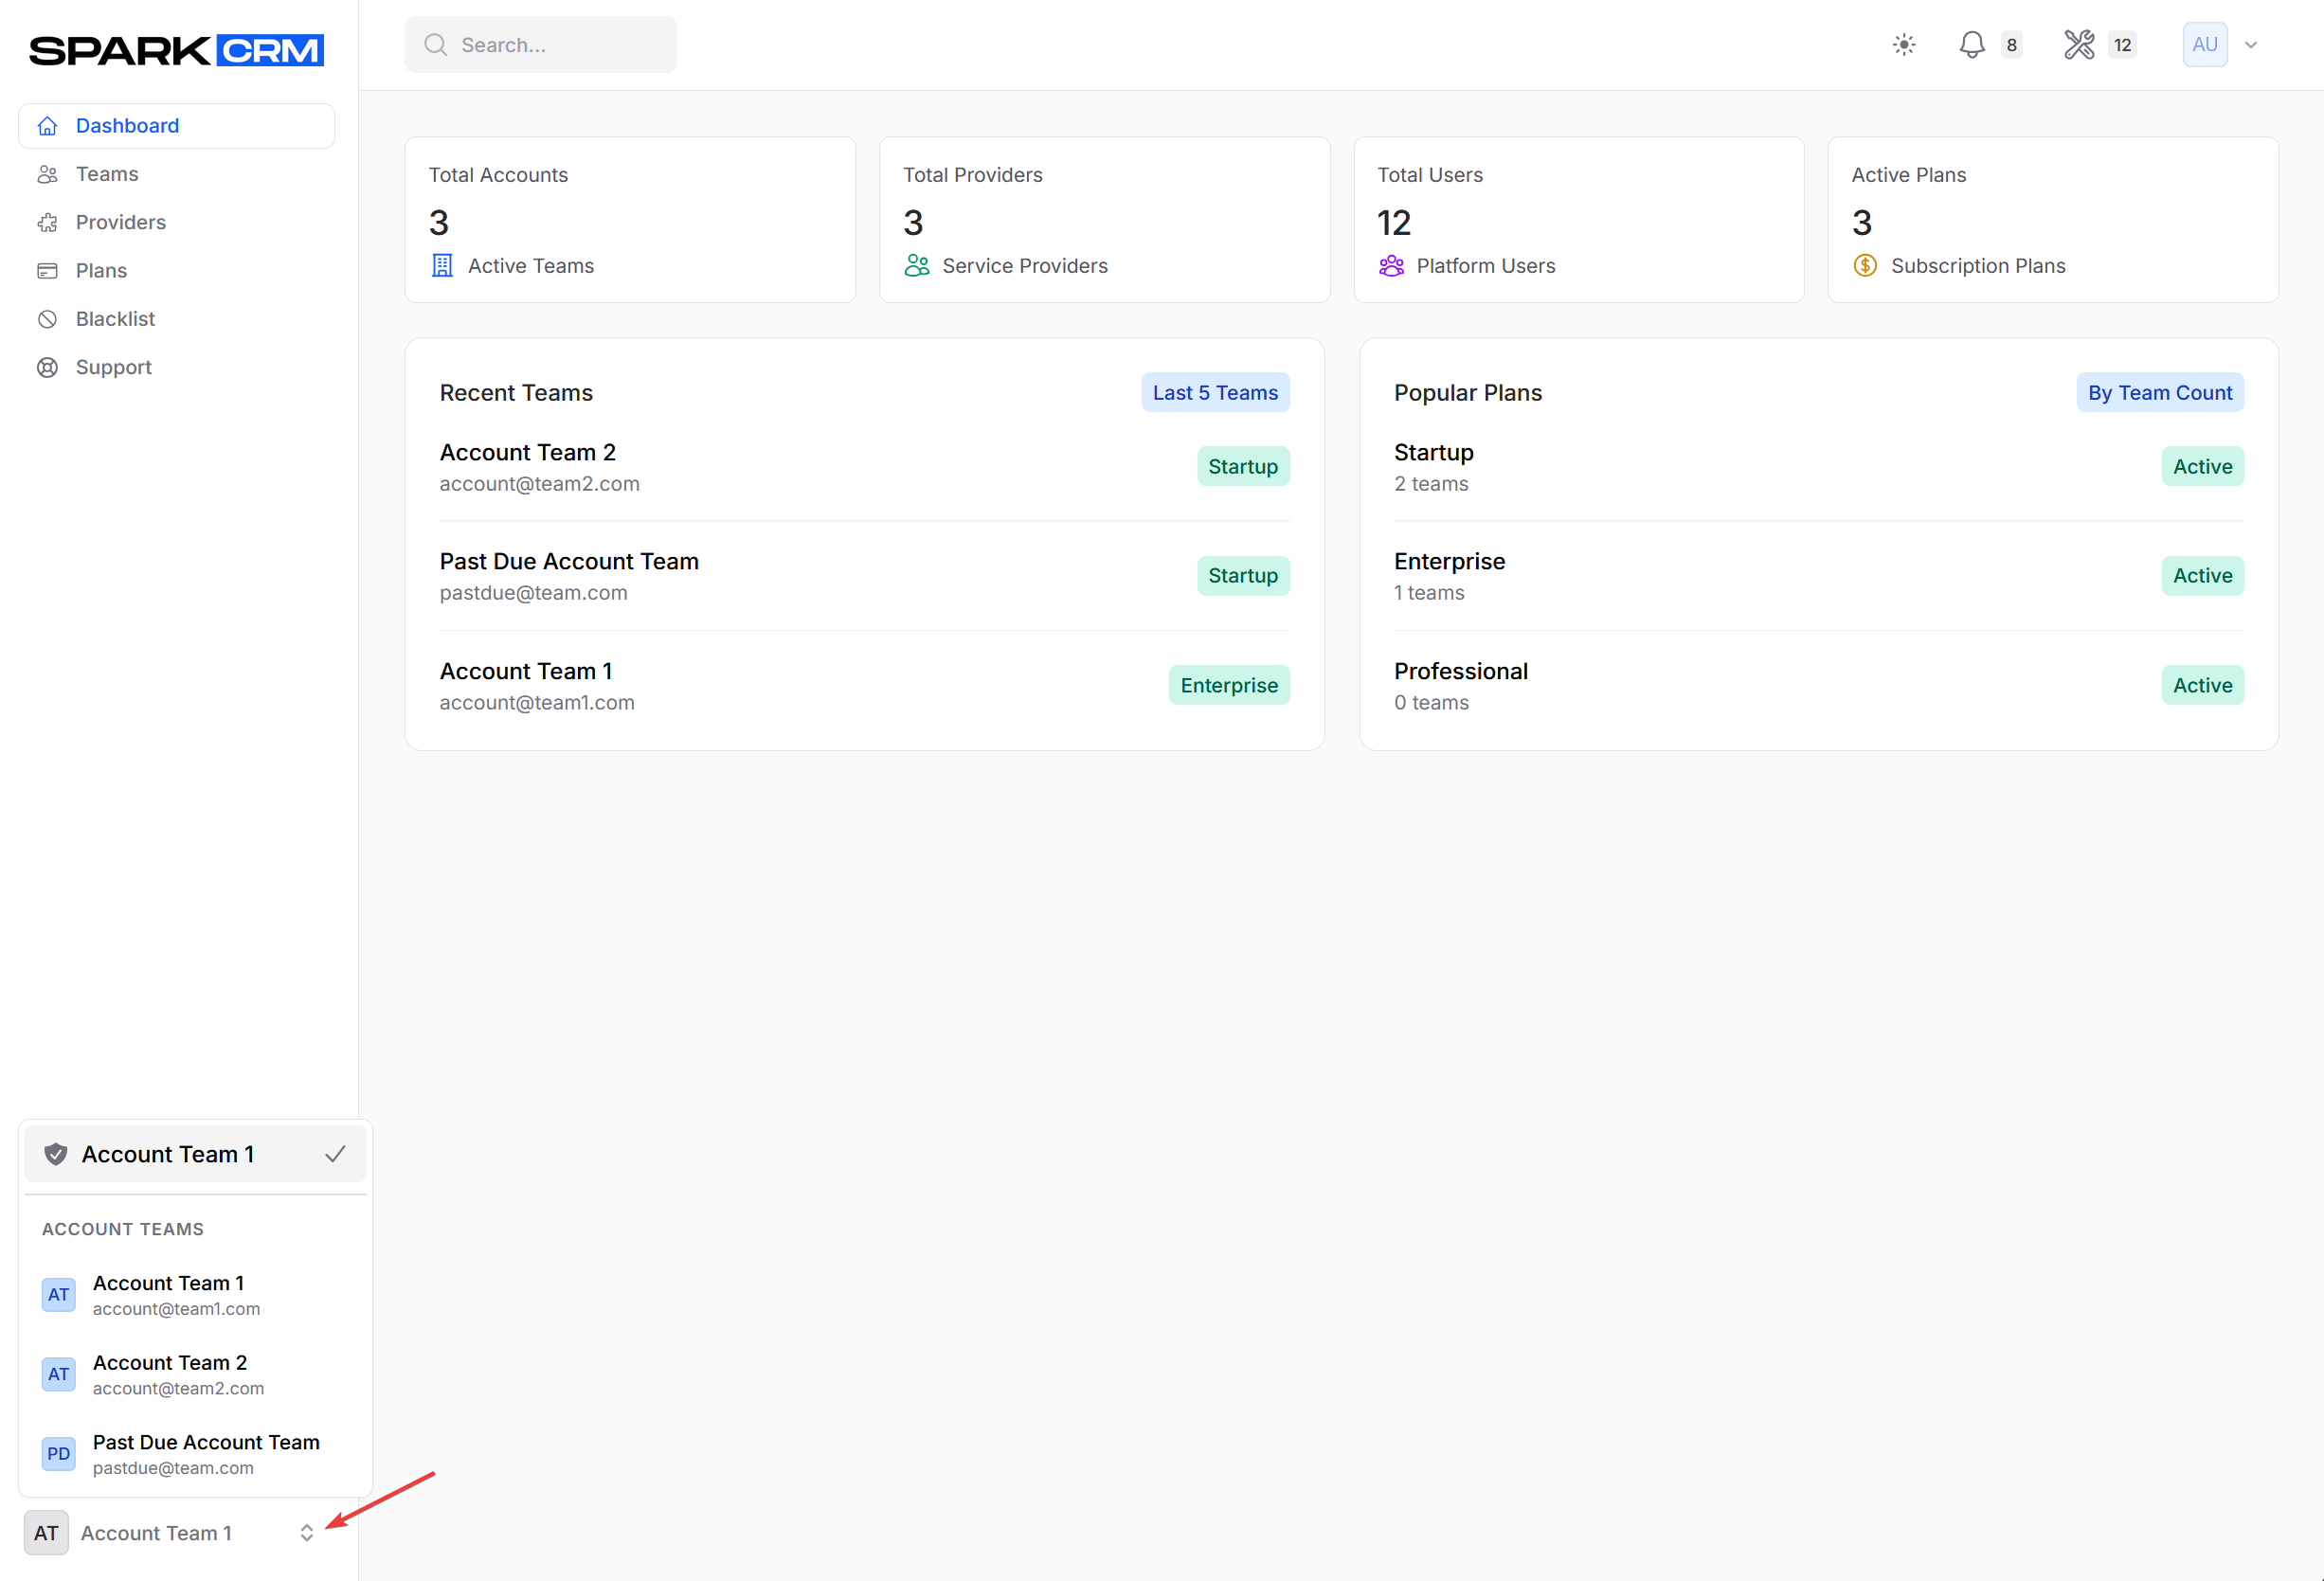
If you belong to multiple teams:
- Click your team name in the bottom left
- Select a different team
- Dashboard updates to show that team’s data
Best Practices
Team Management
- Invite team members with appropriate roles
- Assign the least-privileged role that still lets a member do their job
- Review team access regularly
- Remove inactive members promptly
Billing
- Keep payment method current
- Monitor usage charges
- Review invoices monthly
- Address failed payments quickly
Providers
- Only connect trusted providers
- Limit permissions appropriately
- Review provider activity
- Disconnect unused providers
Troubleshooting
Can’t Invite Member
Check:
- You have permission to invite (team owner or Account Admin)
- The email is valid and passes screening, and is not already invited or already on the team
- The person is not a member of a provider team — connect them through Manage Providers instead
(There is no team member limit.)
Payment Failed
Solution:
- Update payment method
- Retry billing
- Contact support if persists
Provider Access Issues
Check:
- Provider is activated
- Permissions are configured
- Provider account is active
Related Topics
- Settings - Account configuration
- Provider Portals - Provider-specific features