

Blacklists allow you to block specific customers and card BINs from placing orders.
Navigation: Settings > BIN Blacklists / Customer Blacklists
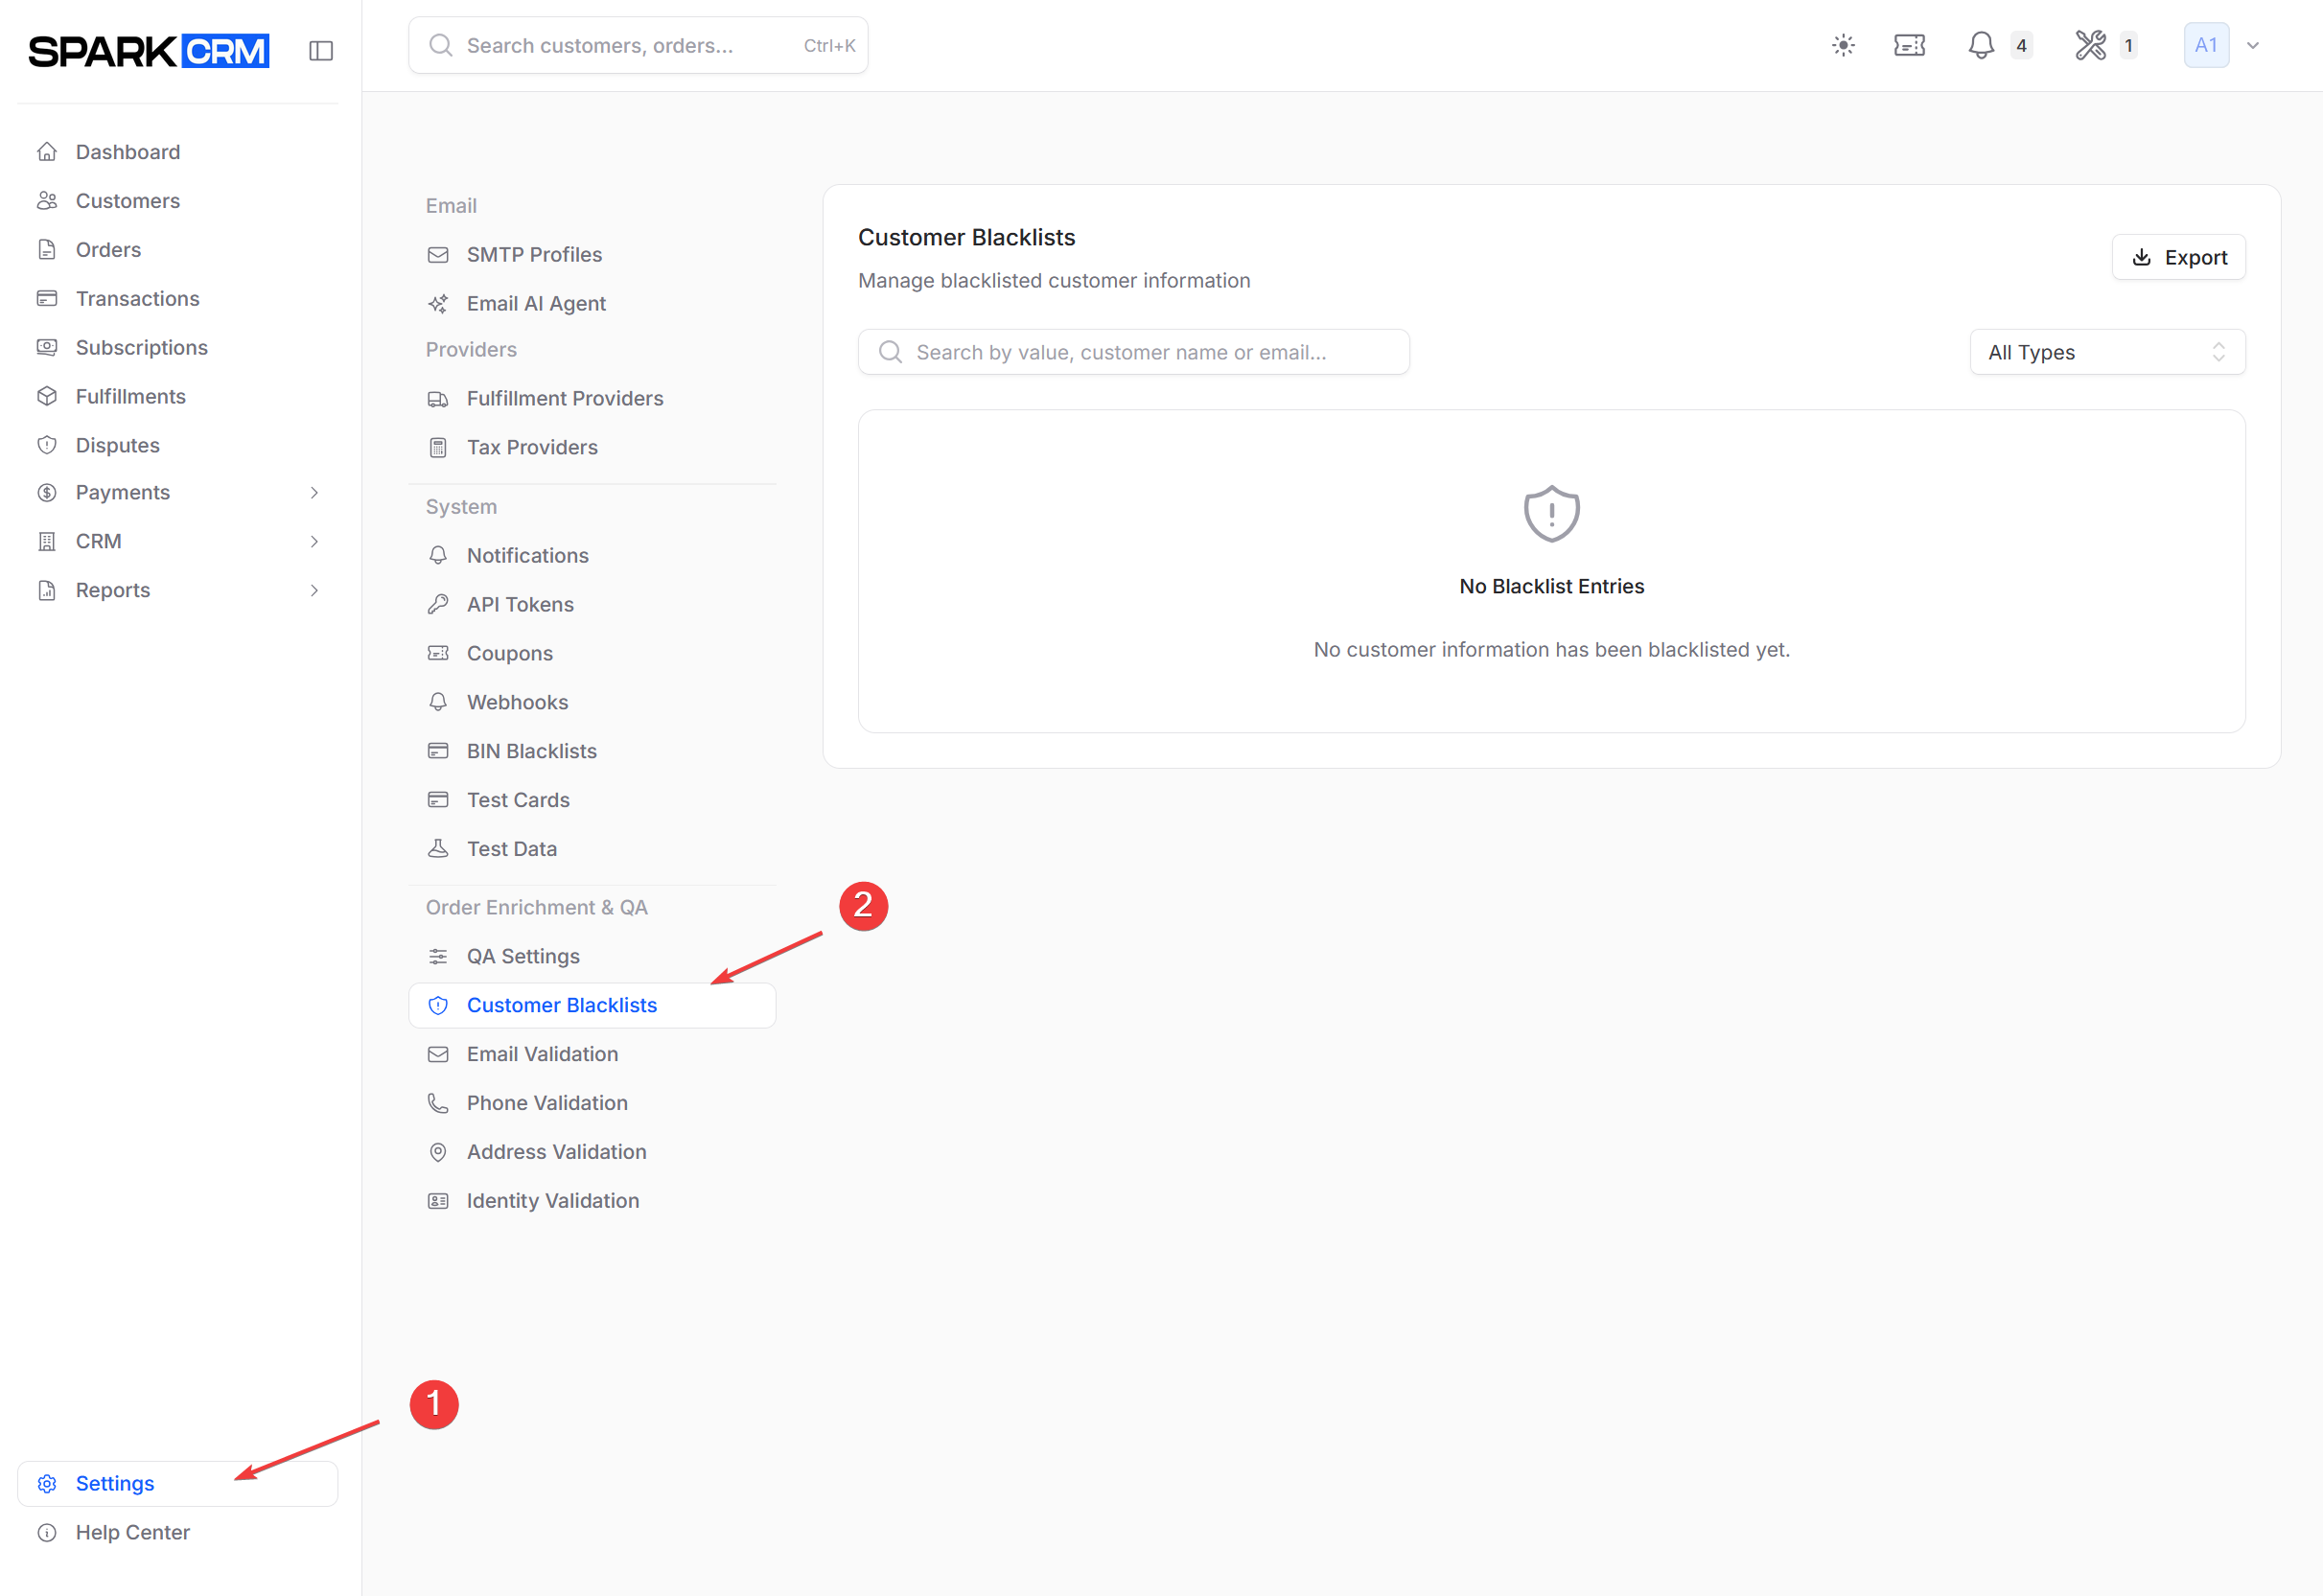
Customer Blacklists
Availability: Customer Blacklists is available on Account-type teams only. Account owners and administrators always have access; other members need the
customer_blacklist:view_anypermission to see the list,customer_blacklist:createto add entries, andcustomer_blacklist:deleteto remove them. The tab is visible to everyone, but without permission it shows an Access Restricted message.
Navigation: Settings > Customer Blacklists
Block customers by various identifiers to prevent fraudulent orders.
Blacklist Types
| Type | Description | Example |
|---|---|---|
| Block by email address | fraud@example.com | |
| Phone | Block by phone number | +1234567890 |
| IP Address | Block by IP | 192.168.1.1 |
| Address | Block by full physical address | 123 Main St, Apt 2, Springfield, IL, 62701, US |
Address matching compares the customer’s entire address (street 1, street 2, city, state/province, postal code, country) as one normalized string — not a substring. A partial street address will never match. The reliable way to add one is from the customer record (Actions > Add to Blacklist > Shipping Address), which captures the full address for you.
Adding a Customer to Blacklist
- Go to Settings > Customer Blacklists
- Click Add Entry
- Select the Type (Email, Phone, IP Address, Address)
- Enter the value to block
- Add an optional reason (it is stored with the entry, but is not shown in the list or the CSV export)
- Click Add Entry
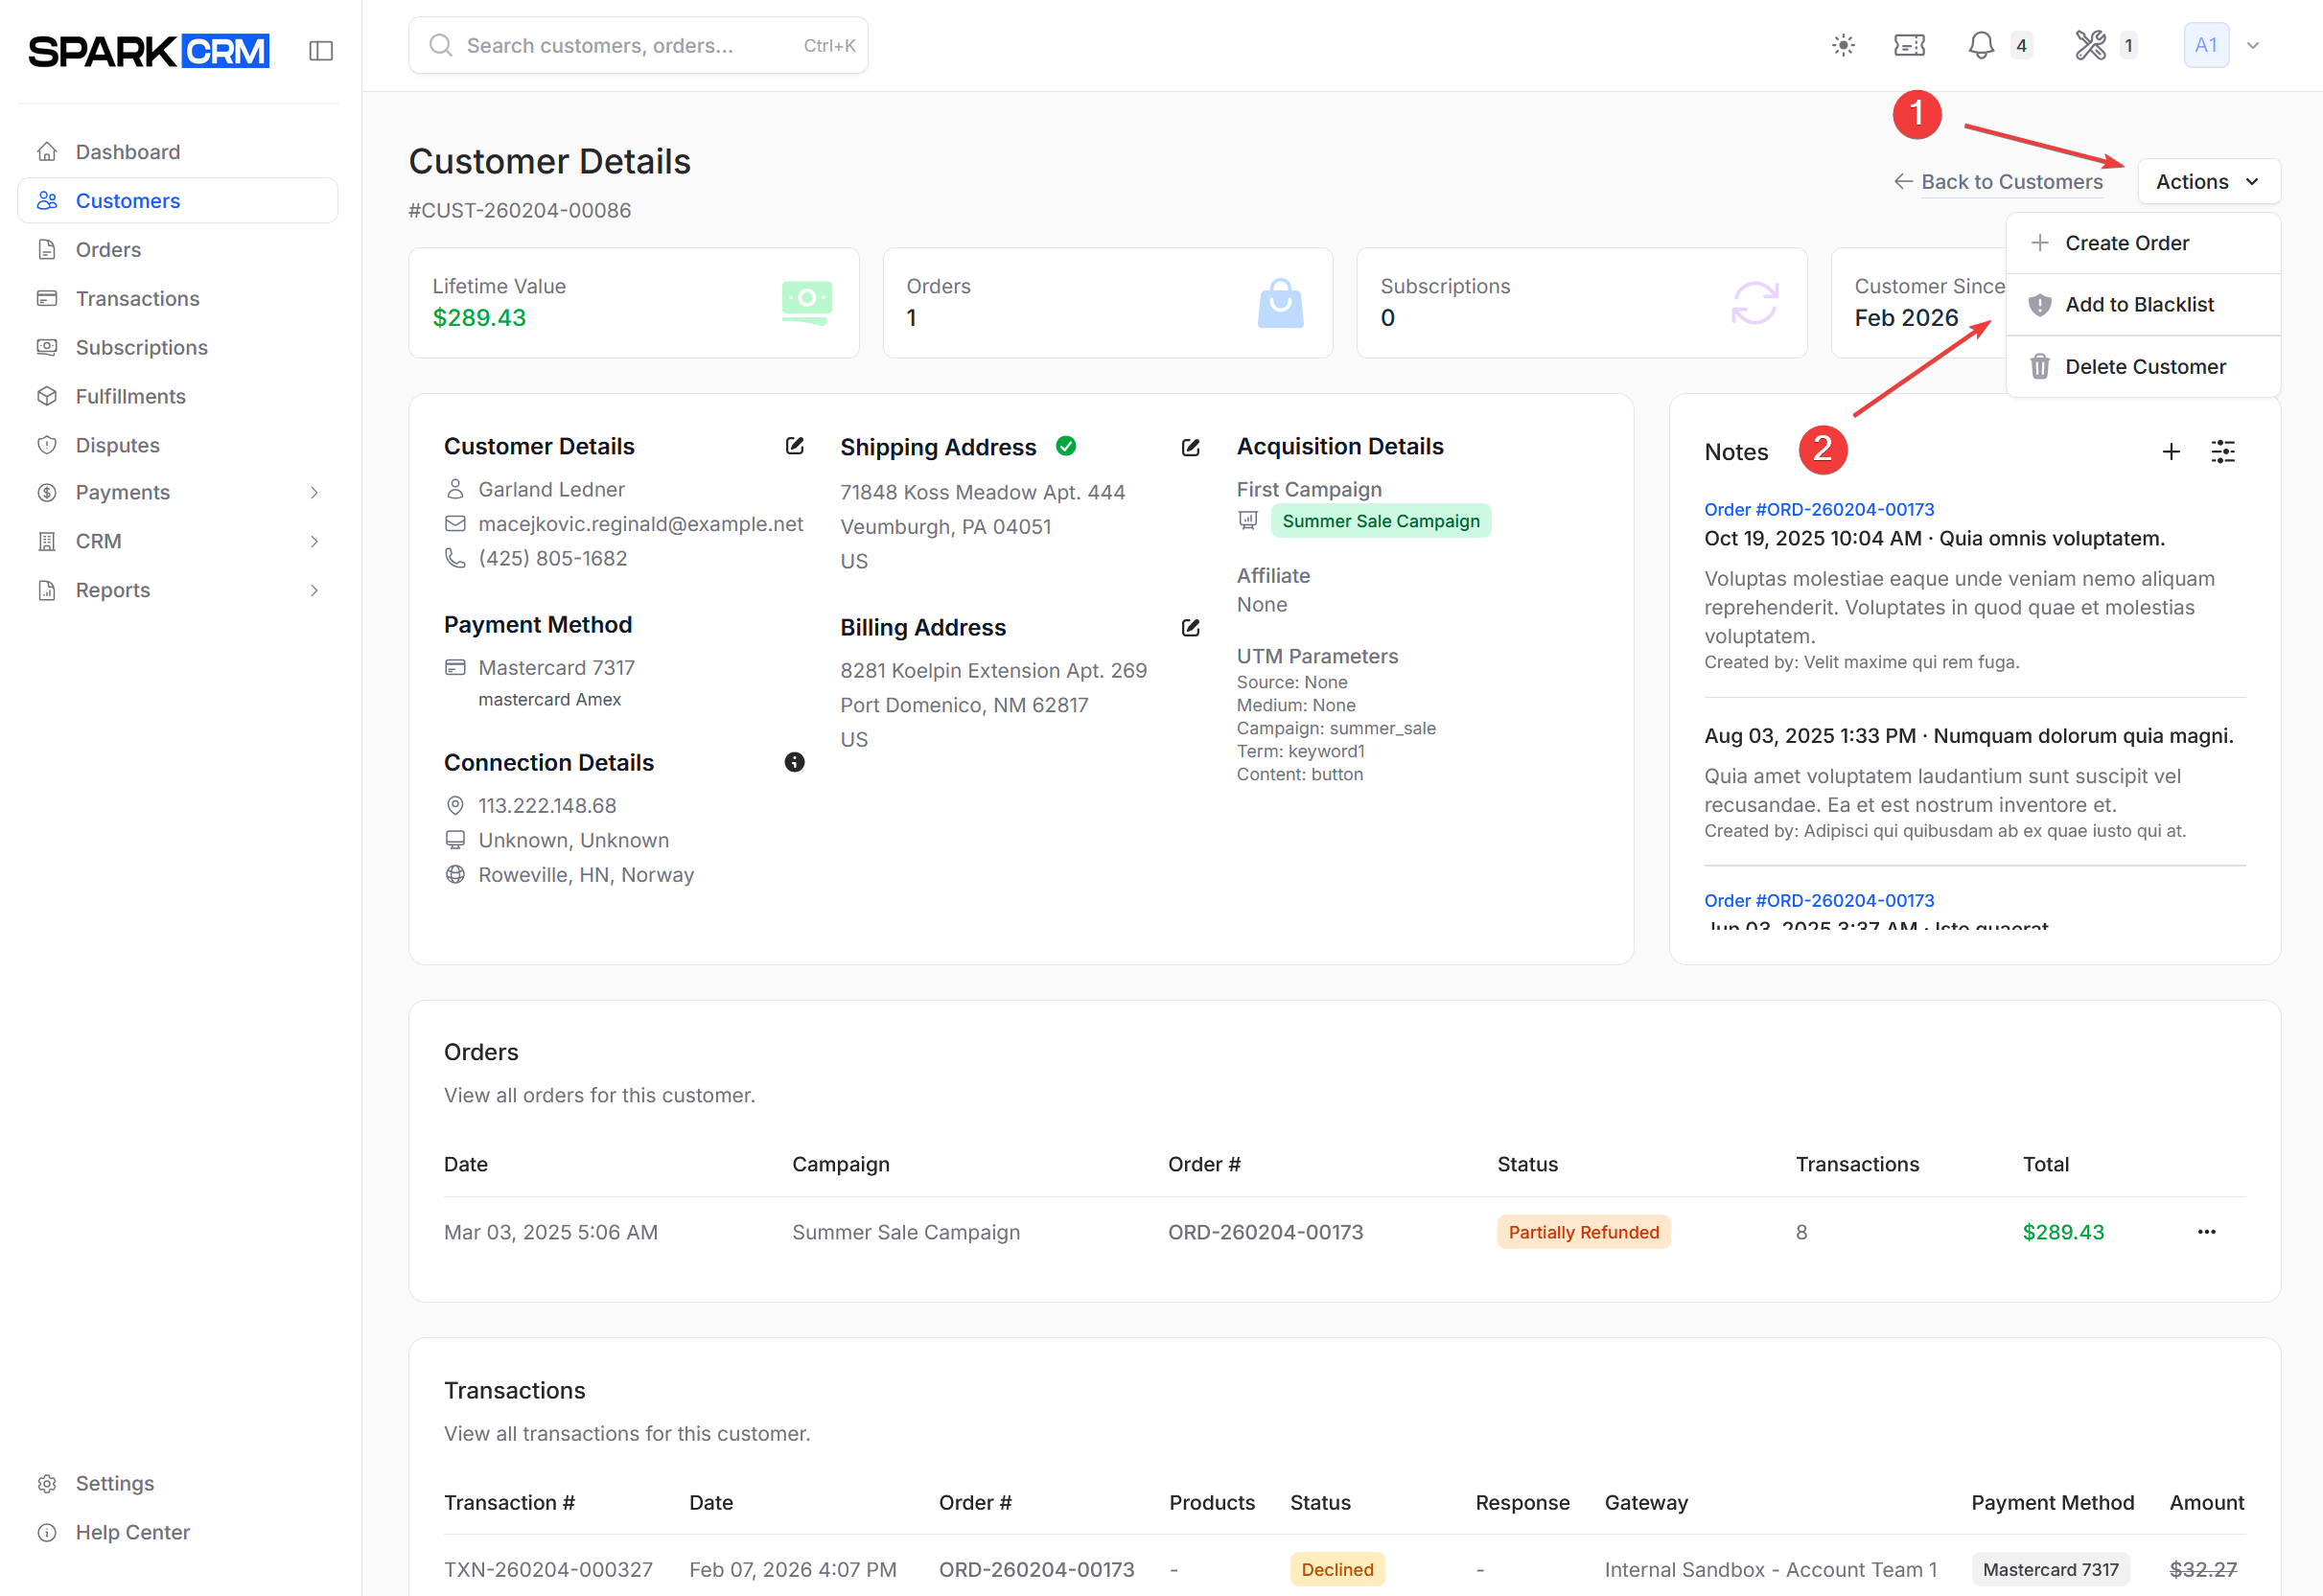
Blacklisting from Customer Record
You can blacklist directly from a customer’s profile:
- Go to Customers
- Find the customer
- Click the Actions dropdown
- Click Add to Blacklist — shown only if you have permission to create blacklist entries and the customer is not already blacklisted; an already-blacklisted customer shows Remove from Blacklist instead.
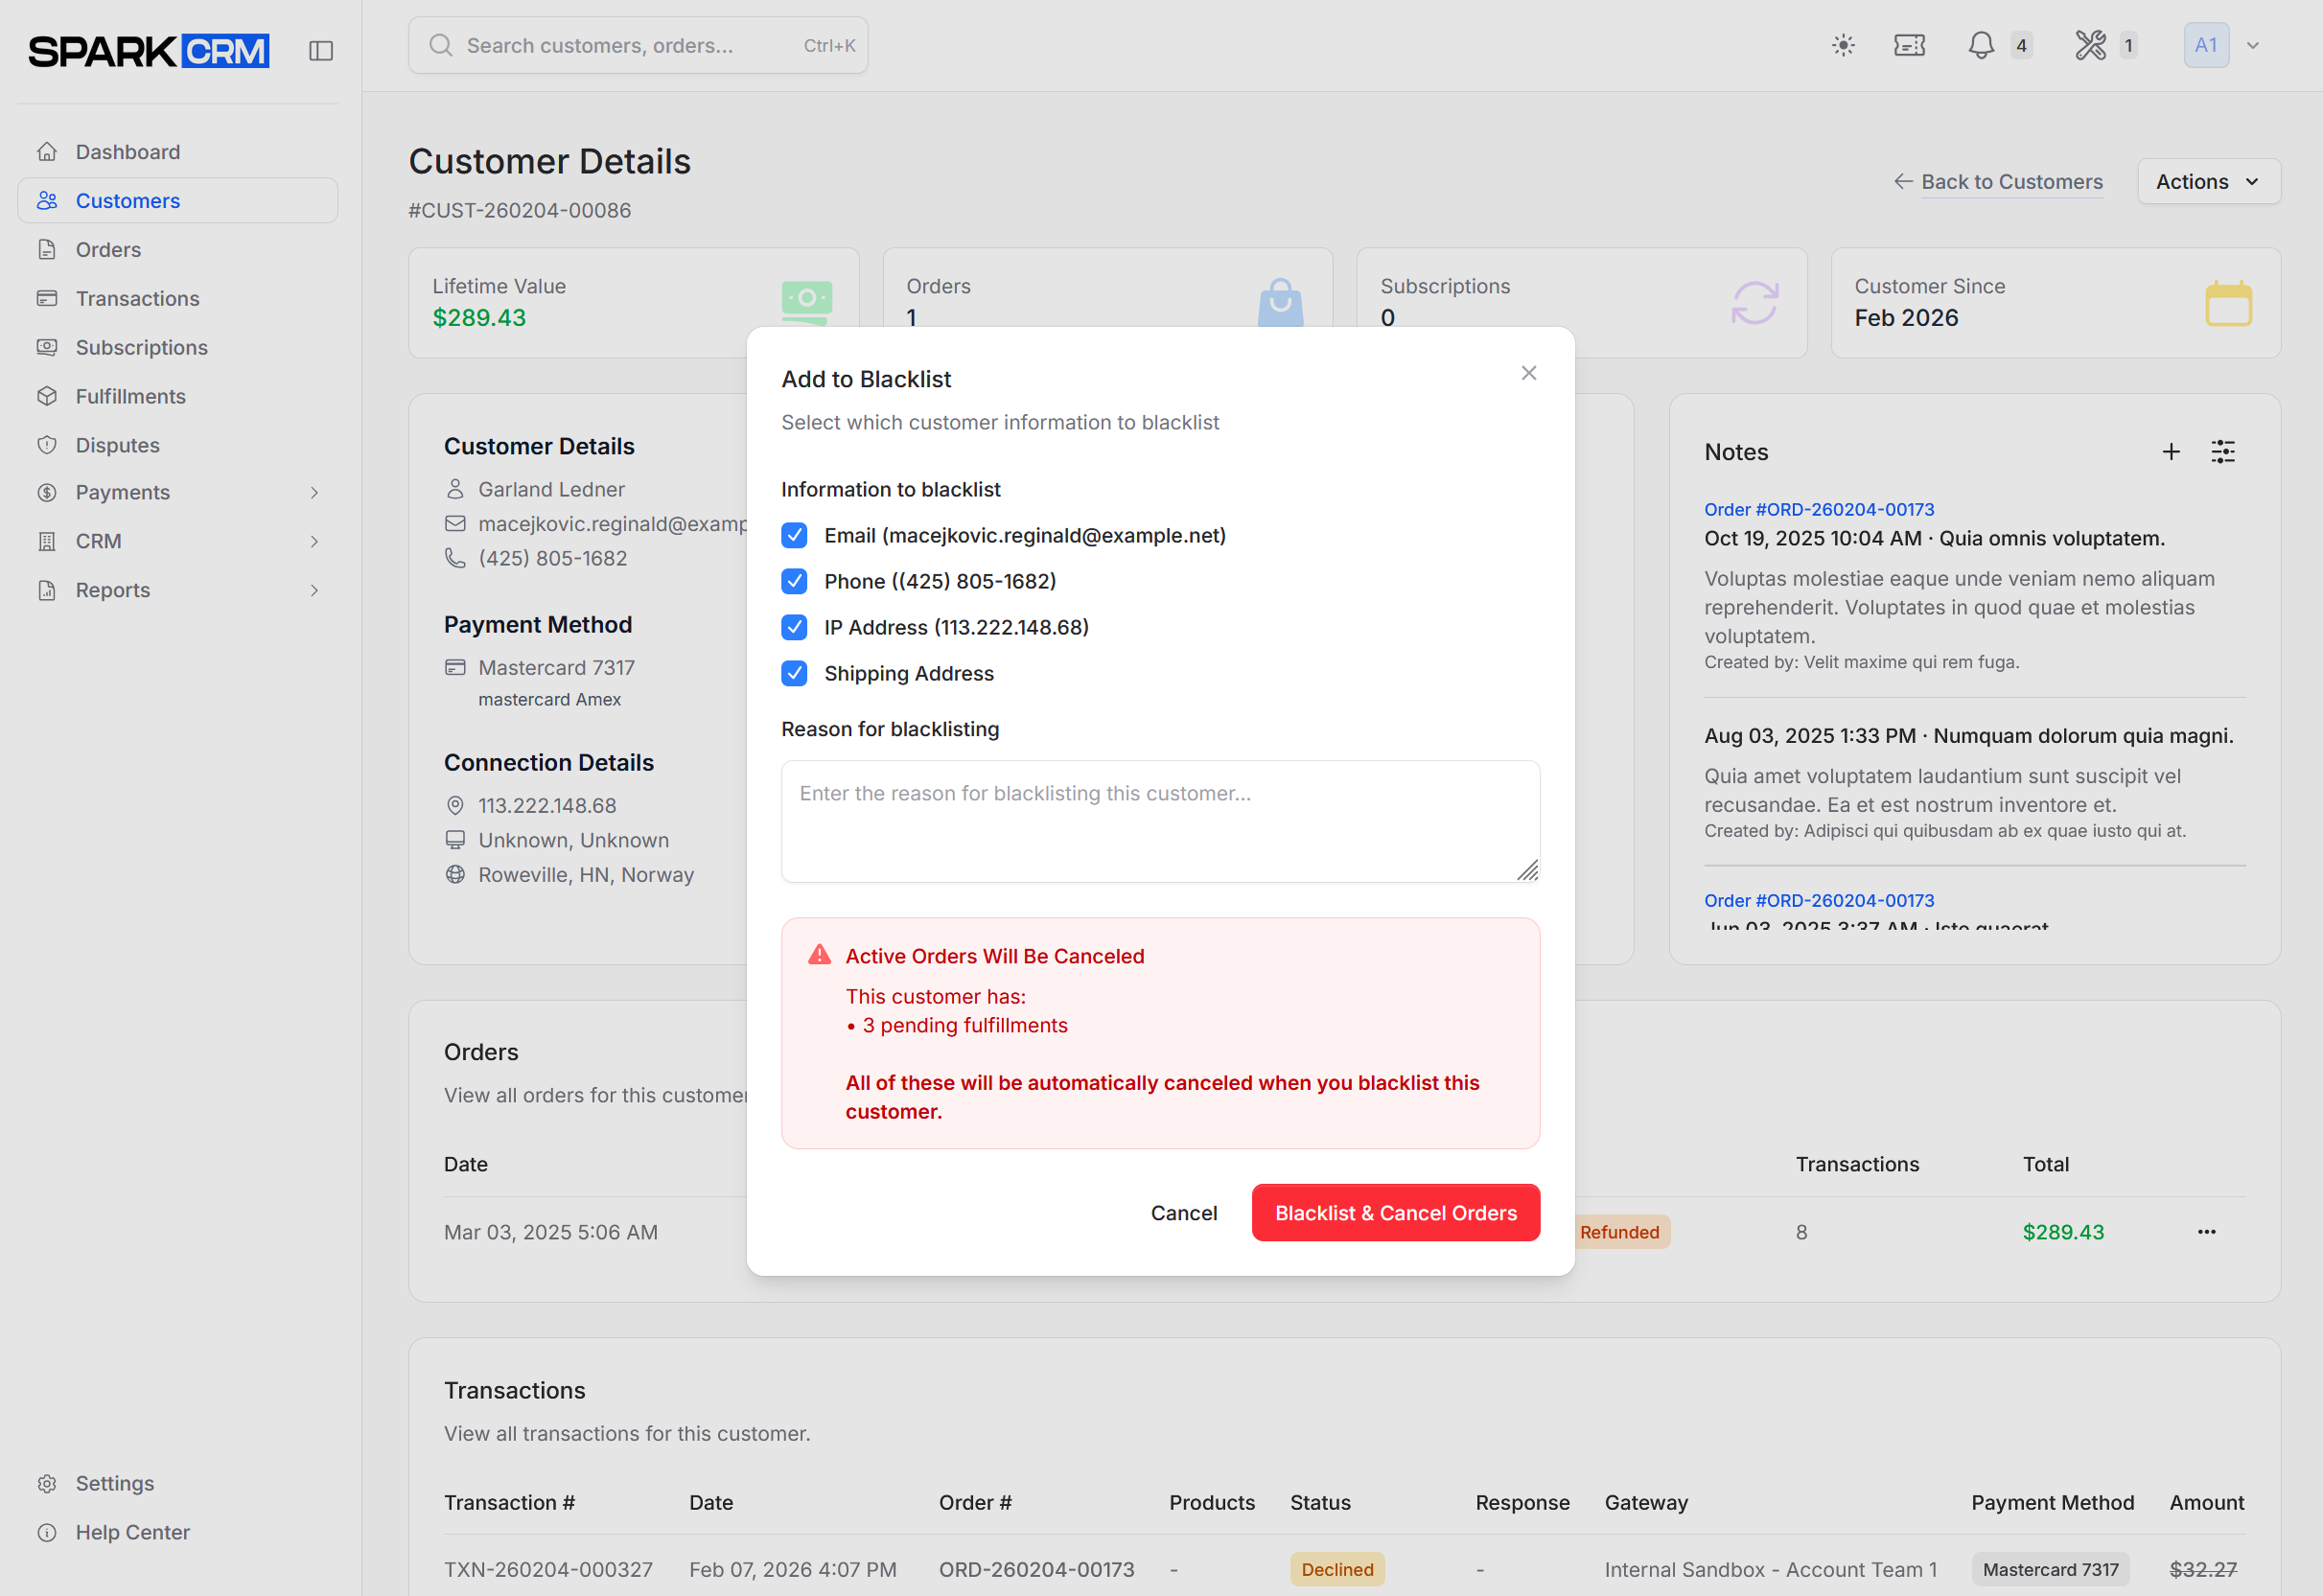
- Select what to blacklist (Email, Phone, IP Address, Shipping Address)
- Enter a Reason for blacklisting (required here, unlike the Settings modal) and click Add to Blacklist — or Blacklist & Cancel Orders if the customer has active subscriptions or pending fulfillments. All of those subscriptions and unshipped fulfillments are canceled automatically as part of the same action, and the reason is recorded as a customer note.
Managing Blacklisted Entries
The blacklist displays:
| Column | Description |
|---|---|
| (checkbox) | Select rows for bulk removal |
| Type | Email, Phone, IP Address, or Address |
| Value | Blocked identifier |
| Customer | Linked customer record, if the entry came from one |
| Blacklisted By | User who added the entry (shows “System” for automatic entries) |
| Date | When it was added |
| Actions | Per-row menu (View Customer, Remove from Blacklist) |
Above the table you can search by value, customer name or email, filter by type, and click Export to queue a CSV (download it from CRM > Exports). Ticking one or more rows reveals a Remove Selected (N) button.
Removing from Blacklist
- Find the entry in the list
- Open the row’s ⋯ menu and click Remove from Blacklist (or tick one or more rows and use Remove Selected)
- Confirm with Remove Entry
Removing an entry deactivates it rather than deleting it — only active entries are matched against new orders.
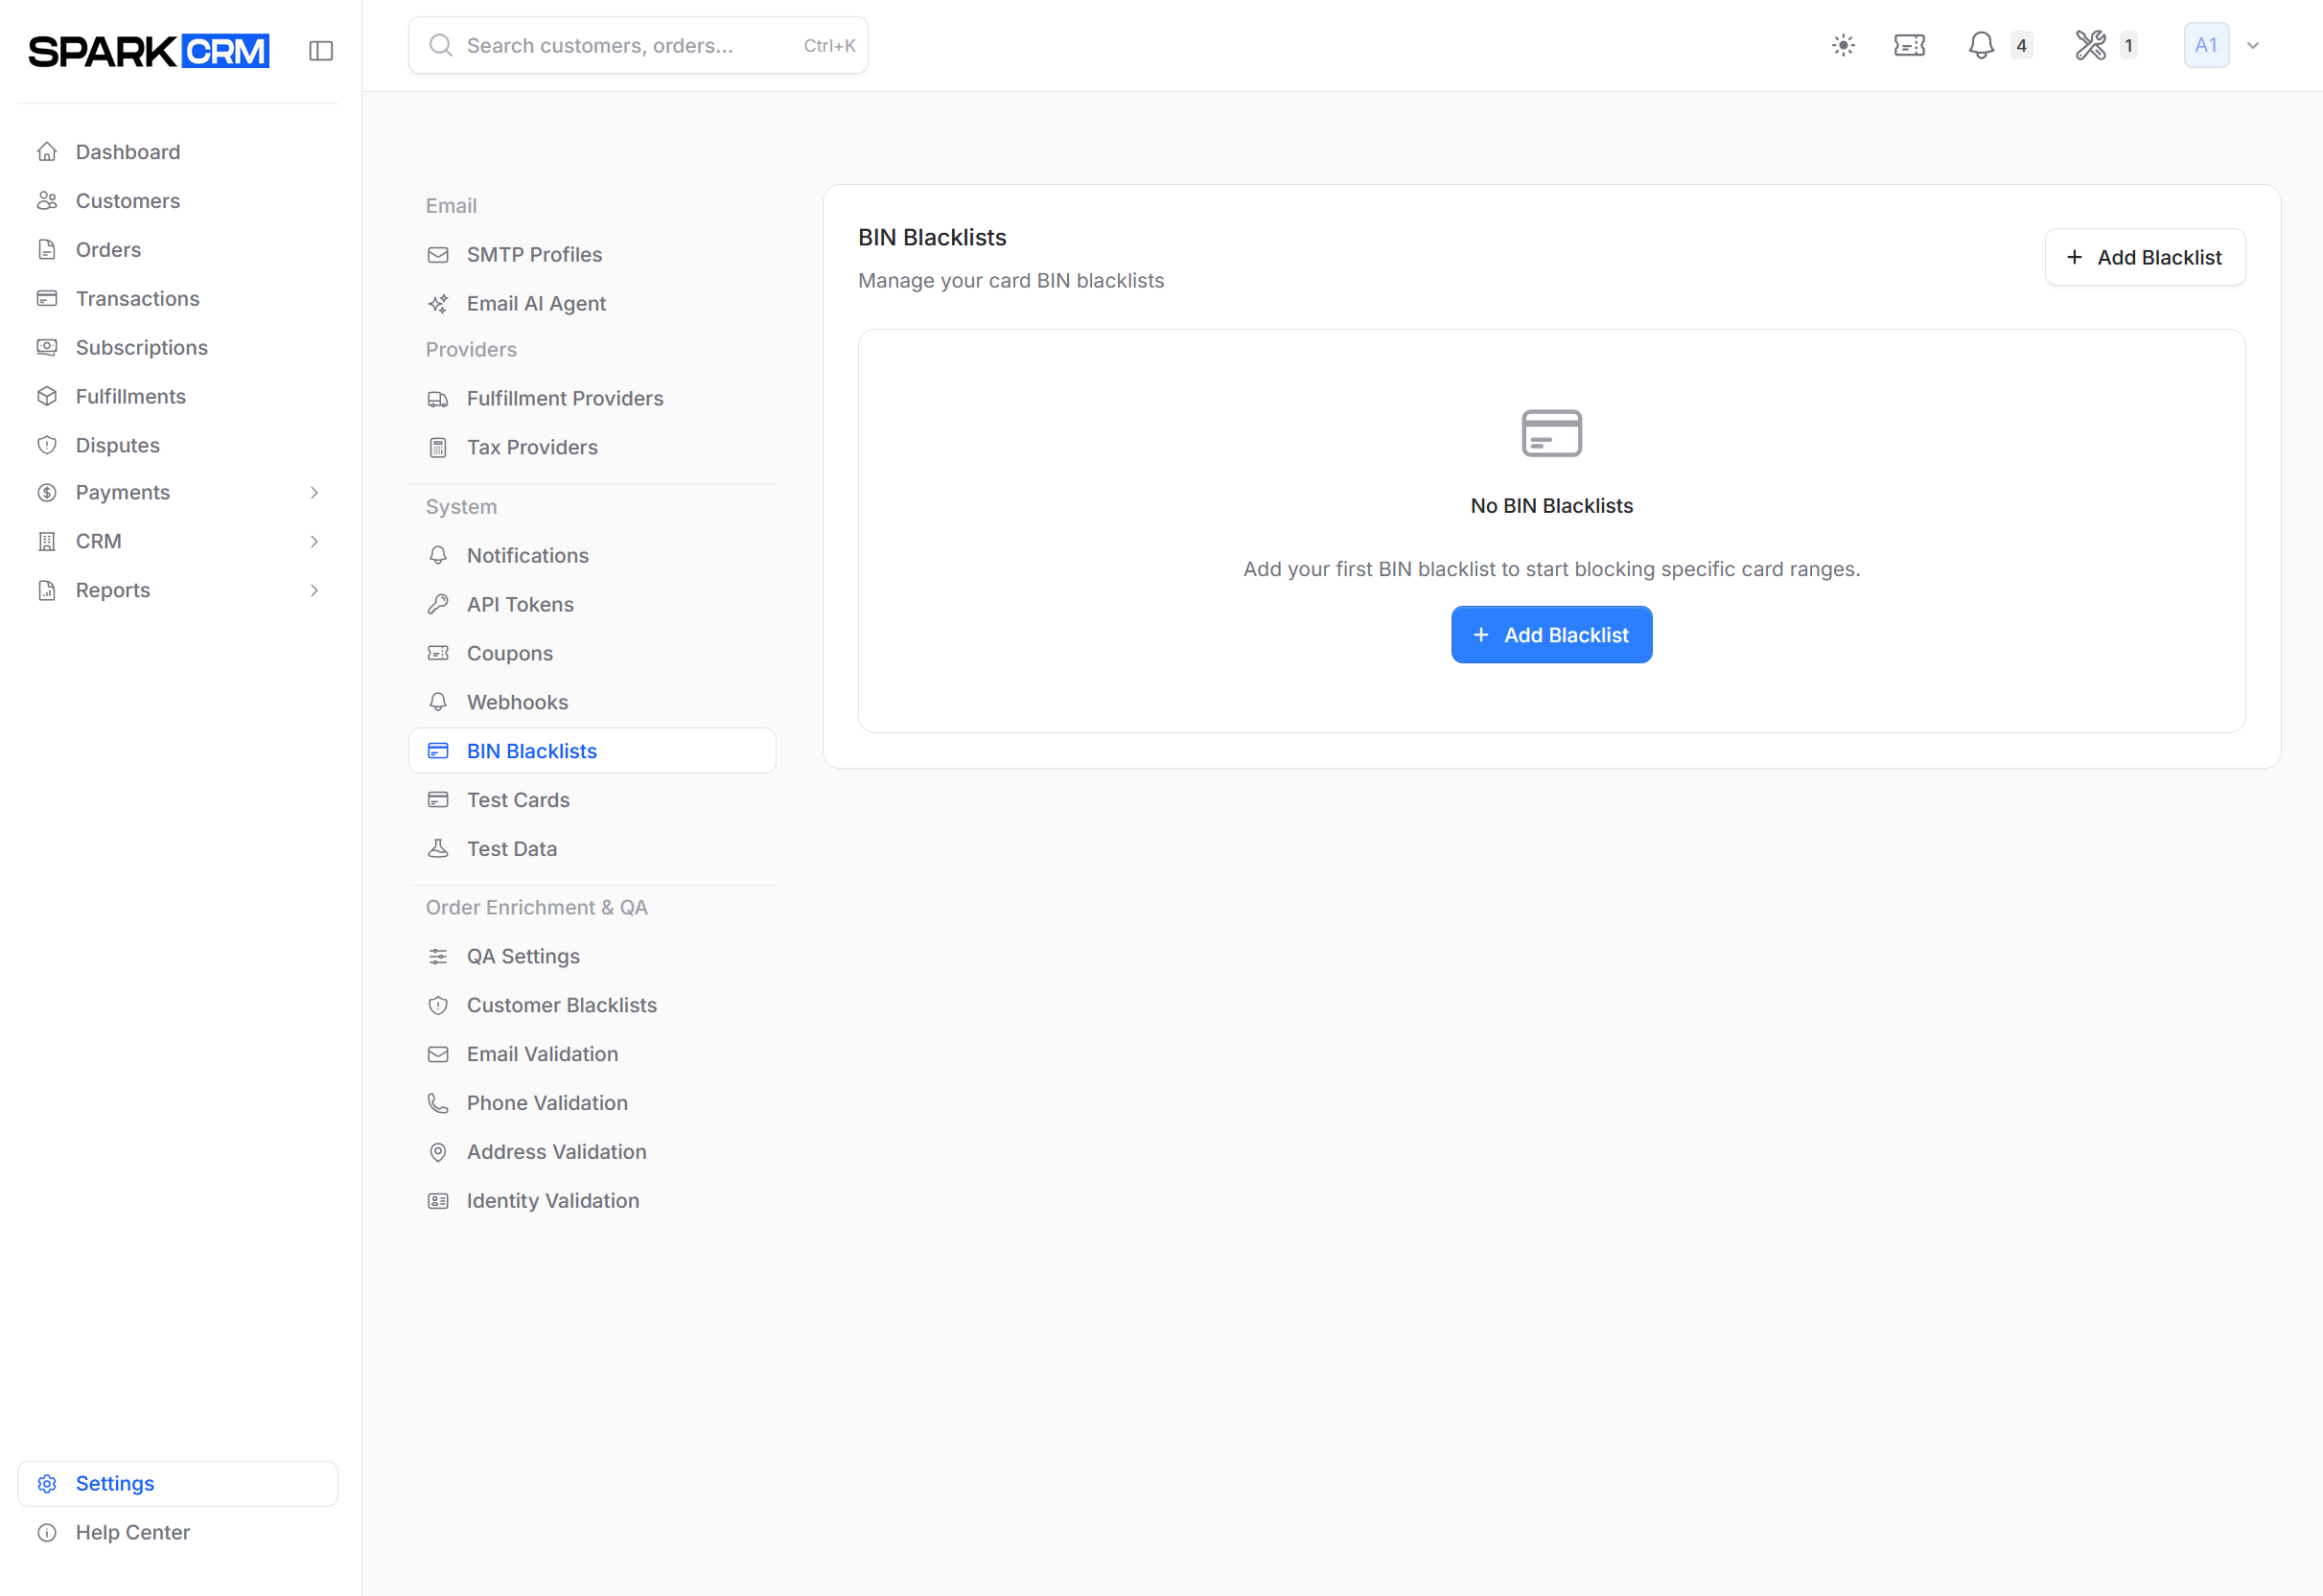
BIN Blacklists
Availability: BIN Blacklists is available on Account-type teams only. Account owners and administrators always have access; other members need
bin_blacklist:view_anyto see the list, plusbin_blacklist:create,:updateor:deleteto manage entries. The tab is visible to everyone, but without permission it shows an Access Restricted message.
Navigation: Settings > BIN Blacklists
Block specific card BINs (Bank Identification Numbers).
What is a BIN?
The BIN is the first 6-8 digits of a credit card number, identifying:
- Card issuer (bank)
- Card type (credit, debit, prepaid)
- Card network (Visa, MC, etc.)
Spark CRM stores and matches 6-digit BINs only.
Why Blacklist BINs?
- Known fraud-heavy BINs
- Prepaid card issuers (if not accepted)
- Geographic restrictions
- Bank-specific issues
Adding BINs to a Blacklist
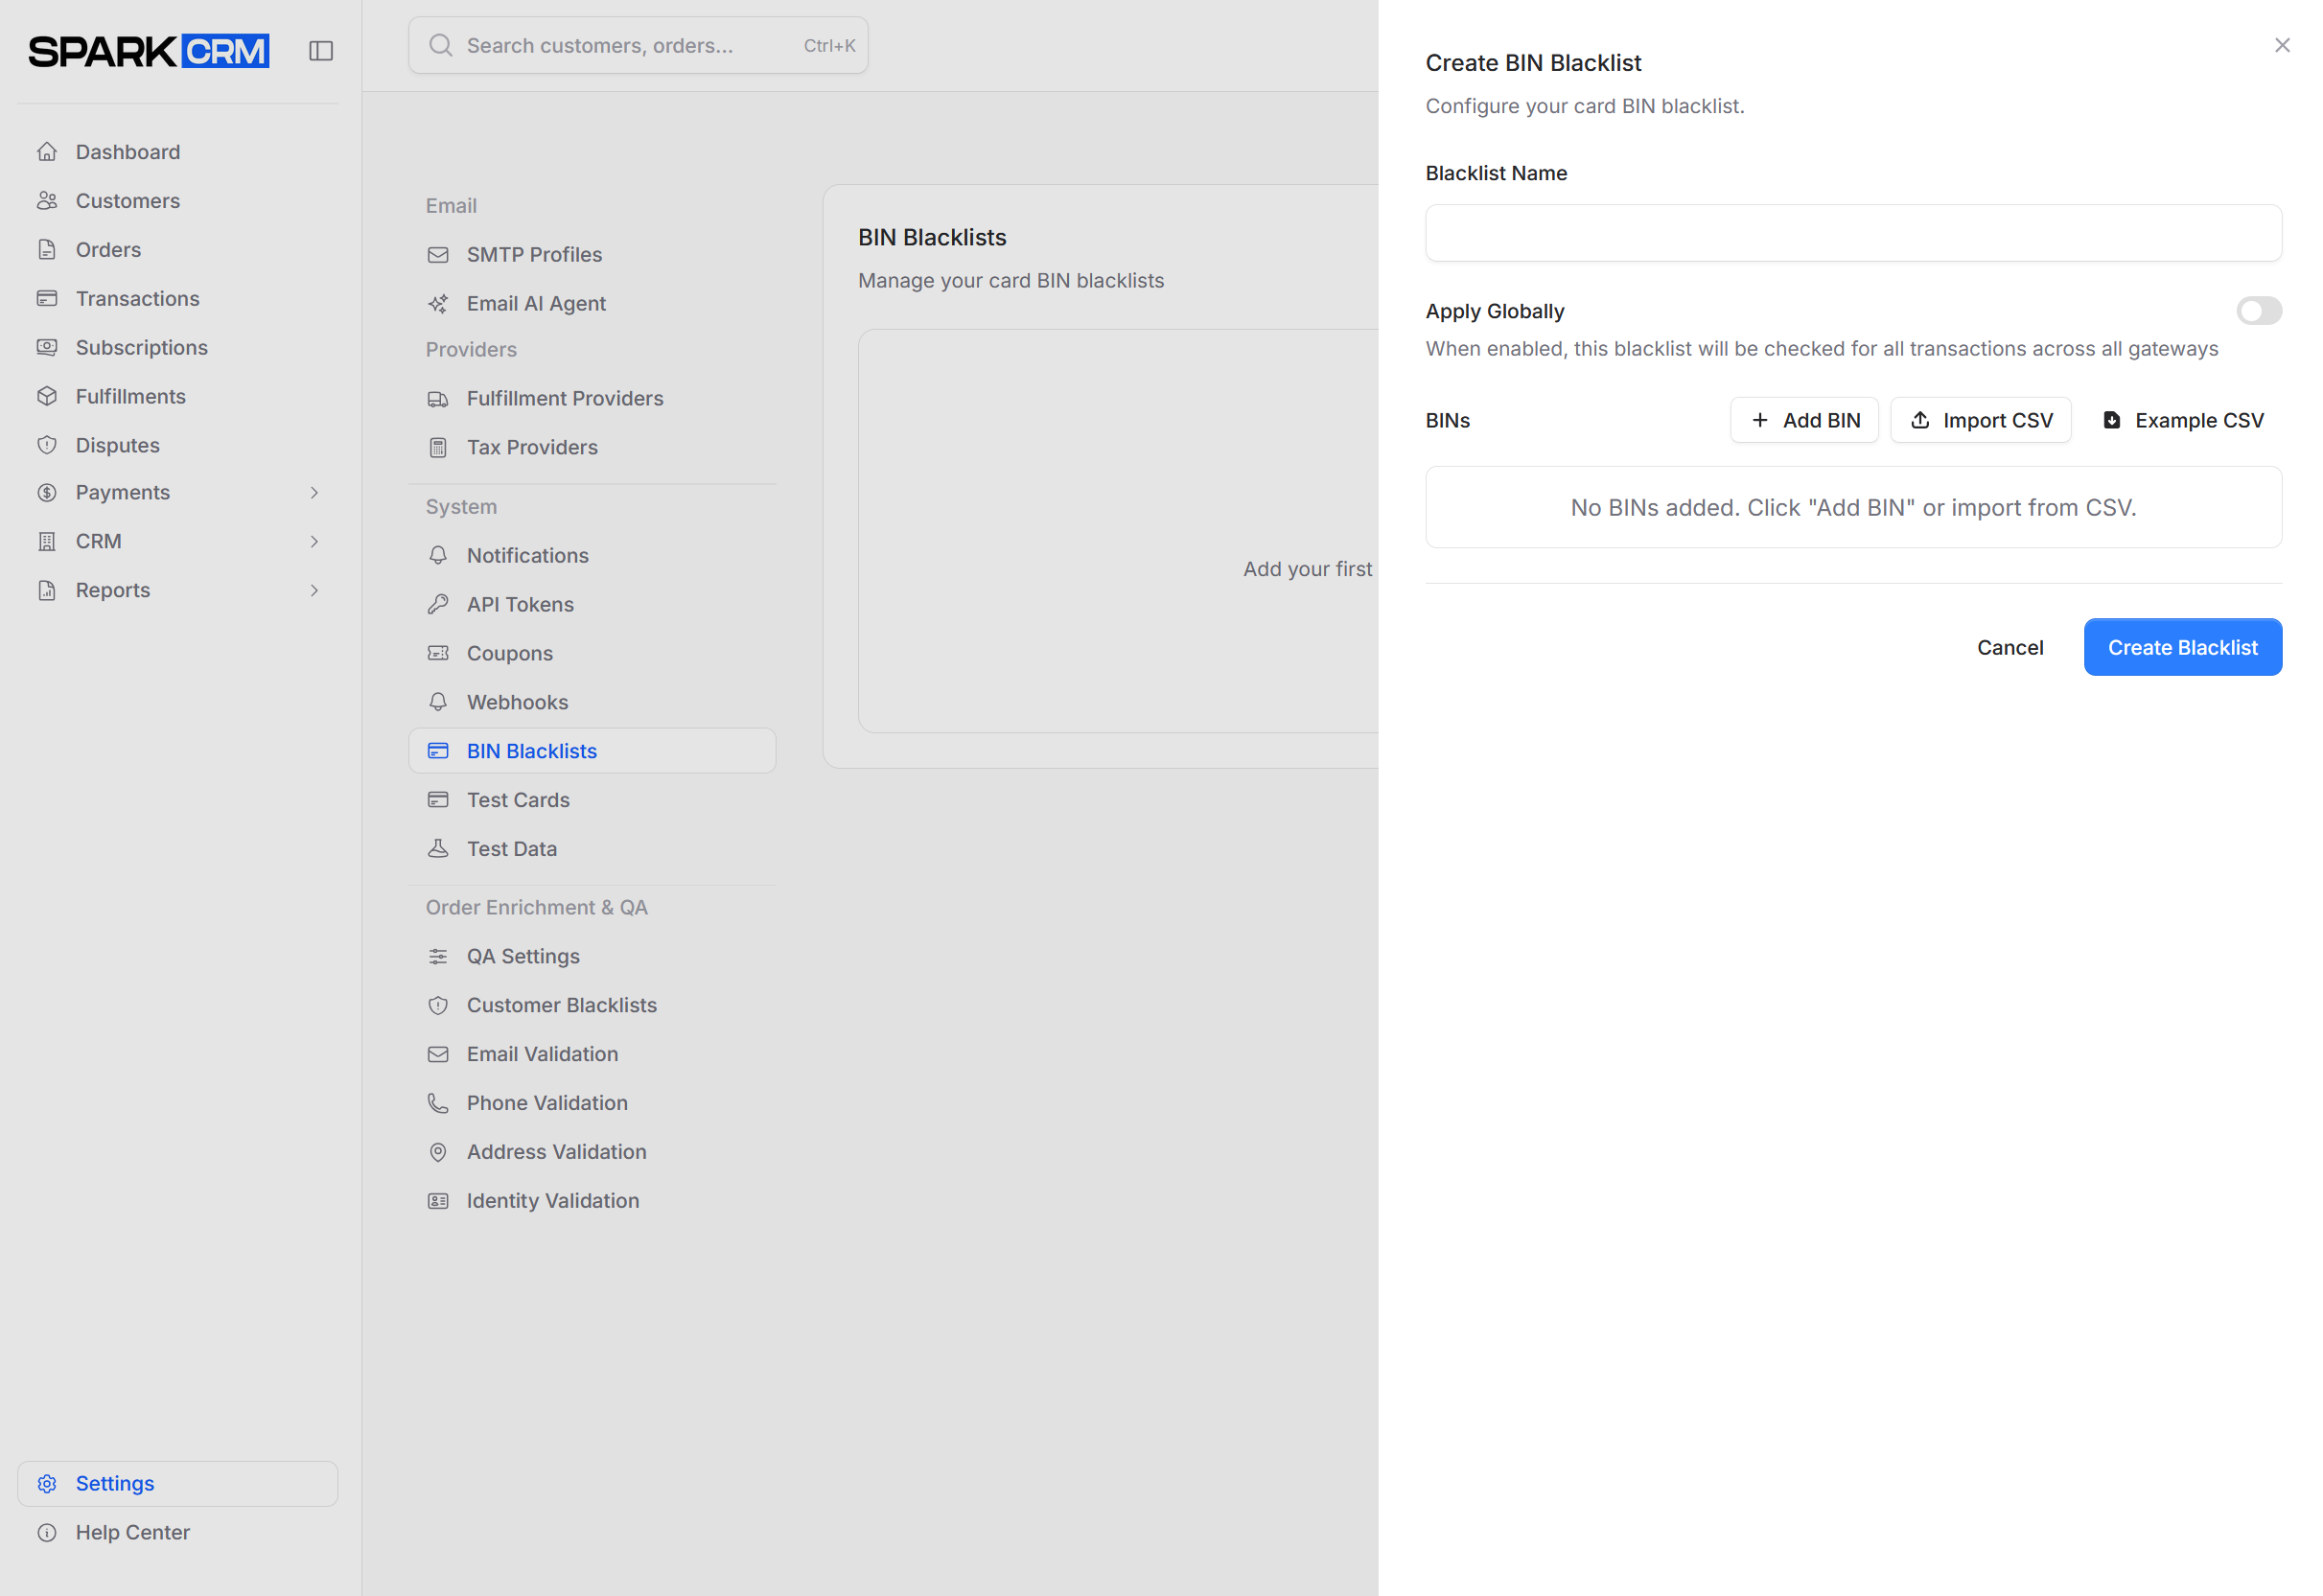
BINs are grouped into named blacklists — you create a blacklist, then add one or more 6-digit BINs to it.
- Go to Settings > BIN Blacklists
- Click Add Blacklist
- Enter a Blacklist Name (required)
- Turn on Apply Globally — a blacklist is only checked against orders when this is enabled
- Click Add BIN and enter the 6-digit BIN Number
- Optionally set Card Brand, Card Type and Issuing Country (dropdowns) and type an Issuing Bank (free text). These are labels for your own reference only — matching uses the BIN alone.
- Click Add BIN to add it to the list
- Repeat for any further BINs, then click Create Blacklist (or Update Blacklist when editing) in the flyout footer to save
Warning: BINs are held in the form until you save. Closing the flyout without clicking Create Blacklist / Update Blacklist discards them — this also applies to BINs added by CSV import.
To add many BINs at once, click Import CSV inside the flyout (or Example CSV to download a template). To change a blacklist later, use the row’s ⋯ > Edit, make your changes, and click Update Blacklist.
BIN Patterns
Only exact 6-digit BINs can be blocked — ranges and wildcards are not supported. To cover several BINs, add them all to the same blacklist (manually or via Import CSV).
- Exact BIN:
411111- Blocks this specific BIN
Managing Blacklisted BINs
The list displays one row per blacklist:
| Column | Description |
|---|---|
| Name | The blacklist’s name |
| BINs | How many BINs it contains |
| Status | Active or Disabled |
| Global Scope | Global or Disabled — only Global blacklists are enforced |
| Actions | Row menu: Edit, Deactivate/Activate, Enable/Disable Global, Delete |
Inside the Edit flyout you can also Import CSV to bulk-add BINs, or click Example CSV to download a template. Blacklists are listed newest-first, 10 per page.
There is no reason or created-by field on a BIN blacklist. Name is the only free-text field on the blacklist itself, so use it to record why (e.g. “High-fraud prepaid BINs — Q3”). BIN blacklists do not record who created them, and no date is shown.
Removing a BIN
To delete an entire blacklist: open the row’s ⋯ menu, click Delete, and confirm with Delete Blacklist.
To remove a single BIN: open the row’s ⋯ menu > Edit, click the trash icon next to the BIN, then click Update Blacklist to save. Closing the flyout without saving keeps the BIN.
To stop a blacklist applying without deleting it, use Deactivate or Disable Global from the same menu.
How Blacklists Work
Order Processing
When an order is placed:
-
Check BIN blacklist
- Card BIN against every Active, globally-applied BIN blacklist
-
Check customer blacklists
- Email against email blacklist
- Phone against phone blacklist
- IP against IP blacklist
- Full shipping address against address blacklist
-
Block
- A match declines the order immediately: a declined transaction is recorded, the order is set to Declined, and a note is written to the customer’s record. BIN matches additionally add a system note to the order naming the blacklist. There is no flag-only outcome.
Blacklist matches always block, and the behavior is not configurable.
Auto-Blacklisting
Spark CRM automatically blacklists customers on certain events:
On Chargeback
When a chargeback, RDR, alert refund, or manual chargeback marking is processed, the customer’s email, phone, IP address and shipping address are automatically blacklisted, and all of their active subscriptions and unshipped fulfillments are canceled. This happens on every dispute and cannot be turned off.
Card BINs are never blacklisted automatically — BIN blacklists are managed by hand only.
From the Email AI Agent
If Auto-Blacklist Threatening Customers is enabled under Settings > Email AI Agent, the AI support agent can blacklist a customer’s email address when it identifies a threatening ticket, and it also cancels that customer’s active subscriptions. Fraud checks and validation services do not create blacklist entries.
Dispute-driven blacklisting is automatic and has no settings — the Email AI Agent toggle above is the only configurable auto-blacklist option.
Best Practices
Customer Blacklists
Do blacklist:
- Confirmed fraudsters
- Repeat offenders (chargebacks already blacklist automatically)
- Known bad actors
Don’t blacklist:
- Legitimate refund requests
- Customer service issues
- Single declined payments
BIN Blacklists
Do blacklist:
- Known high-fraud BINs
- BINs from blocked regions
- Prepaid BINs if policy prohibits
Don’t blacklist:
- Entire card networks
- Large issuing banks
- Based on single incidents
Documentation
- Always add a reason when blacklisting a customer — it is required when blacklisting from a customer record, and is saved as a customer note
- Give BIN blacklists a descriptive name; there is no reason field for BINs
- Review blacklists periodically
Troubleshooting
Legitimate Customer Blocked
Solution:
- Open the customer’s record and use Actions > Remove from Blacklist — this clears all blacklist entries for that customer at once
- Enter a reason for the removal and confirm
- Tell the customer they can retry — the change takes effect on their next order attempt
Removing a single row from Settings > Customer Blacklists only lifts that one identifier. Because blacklisting a customer (and any chargeback or RDR) creates several entries at once, the customer usually stays blocked by the others.
Too Many Blocks
Consider:
- Review blacklist entries
- Check for overly broad entries
- Balance fraud prevention with conversion
Blacklist Not Working
Check:
- The entry is still Active — removing an entry only deactivates it, and only active entries are matched
- You are matching the right identifier type
- For an address entry, the value must be the customer’s full address — matching compares the whole normalized address, not a fragment
- For a BIN blacklist, Apply Globally must be enabled, or it is never checked
Spelling and whitespace are handled automatically: values are trimmed and normalized on both save and lookup (emails lowercased, phones reduced to digits, addresses lowercased with punctuation collapsed).
Related Topics
- QA Settings - What happens to orders held for QA review
- Validation Services - Data verification